So you have your slick website designed, but still seated somewhere on your local computer. It’s now time to get it online, so you begin to wonder how do I get to put my website on the Internet. This guide will answer all your questions.
Therefore, the purpose of this guide is to help learn how to get your website from your local computer onto the Internet where people can get to access it from any part of the world you can imagine.
Requirements: What you need to get your website Online.
To completely get you website online, you only need two requirement:-
- Hosting account.
- Domain name.
Why you’ll need a hosting account
Just the way your web files are seated on your computer, there are computers which are dedicated to do just that. They make your web files available and accessible via Internet always. They are called web servers.
So, you need to ‘rent’ some space from a hosting company such as 1and1.com where you will store your web files in order to be accessed over the Internet.
When you buy a hosting acount, it will include a database, you will also be alloted a certain amount of webspace such as 1GB.
Some times, hosting companies such as 1and1.com, give you a free domain name when you buy a hosting account from them.
To buy a hosting account from 1&1, click here to get started.
Why you’ll need a domain name.
A domain name is an address to your website. For instance, wpchap.com is my address to this website, www.facebook.com is Facebook’s domain name.
Similarly, you will also want to buy a domain name for your website from domain registrars like Namecheap.com or Godaddy.com.
Here are 8 Tips On Choosing The Right Domain For Your Website.
People can still access your website even without a domain name using an IP, however, a domain name is preferred because it’s easy to remember and type compared to an IP.
Moving Web Files From Your Computer To your Hosting Account.
After purchasing a hosting account, you can now transfer your web files from your local computer to the web server on you hosting account.
You will have to download and install an FTP client such as FileZilla to enable you upload your web files to the server.
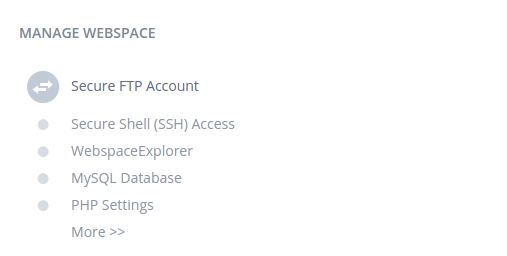
Now to transfer your files using FileZilla, you will need an FTP Account from your host. This is included when you buy a hosting account.
Follow this easy to understand guide to learn how you can upload files to your server using Filezilla.
When you successfully transfer you web files to your webserver, you will be able to see the folder containing your webfiles like so;

1&1 doesn’t use cPanel. On a cPanel enabled host, your files will appear like so:-
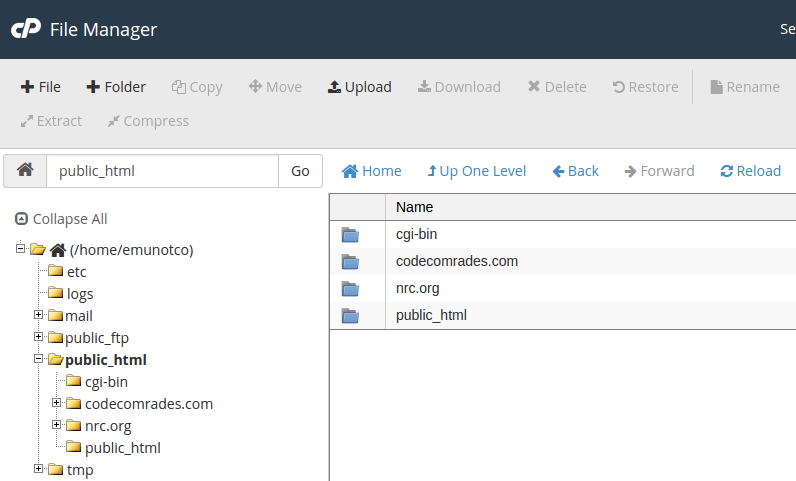
Note: With a cPanel, you will have to place your website folder inside ‘public_html’ folder. ‘public_html’ folder is like the ‘htdocs’ of xampp server on your local development server.
Connecting your domain name to your website.
In case you buy a hosting account and domain name from the same company, linking your domain name to your website is really easy.
Here is an example:-
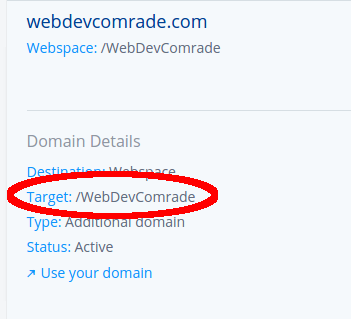
Because my website is located on the root folder WebDevComrade, I simply have to change destination of my domain to that very folder. Here is a screenshot:-
However, if you happen to buy a domain name from a different company (different from where you buy your hosting account), you will have to point your DNS to your where your hosting account.
You get these nameservers from your host, then feed them to your domain DNS settings which is from a different company. Here is an example of my domain from namecheap.com pointing to 1and1.com servers:-
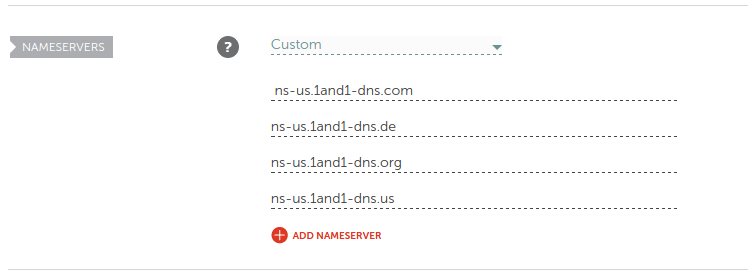
Doing this lets your website show up when people type in your domain address regardless of the domain and hosting company being different.
Summary
In summary, here is what you do to get your website online:-
- Buy a hosting account & domain name.
- Transfer your webfiles from your local computer to a webserver on hosting account.
- Connect your domain to your website.
Conclusion
The process above should be able to get you up and running as far as hosting your website is concerned. If you have reached this far, your website should be already online and ready to be accessed by millions of people over Internet.
However, just in case you have problems hosting your website, feel free to leave your question and comment below and I will be glad to help you.