Three steps to create a backup, three steps to restore, simple! However, sometimes creating a backup with Duplicator plugin is easier than deploying or restoring.
So, here is an easy-to-follow guide to help you successfully recover your website or move it to another host using the Duplicator plugin.
If you are migrating and you haven’t made a backup of your website yet, here is a quick guide on how to create a backup using Duplicator plugin in 3 easy steps.
But before you start, here are a few things you’ll want to do first:-
- Create a New Folder on the the server you want to restore or move your site. Make sure you leave this folder empty. If the folder already exists, make sure it is empty, delete or move whatever file is there.
- Transfer the installer.php and archive (.zip) files to the server using a file transfer tool such as FileZilla.
Now, with those two files (installer.php and archive) in place, let’s do it!
To start the deployment, type the address to the folder you want to deploy the website. For instance, wpchap.com/installer.php, this is because my domain is already pointing to this folder where I uploaded the two files.
To know you’ve typed a right address, you should see a window like one in the screenshot below appear on your browser.
Step #1 – Deploy
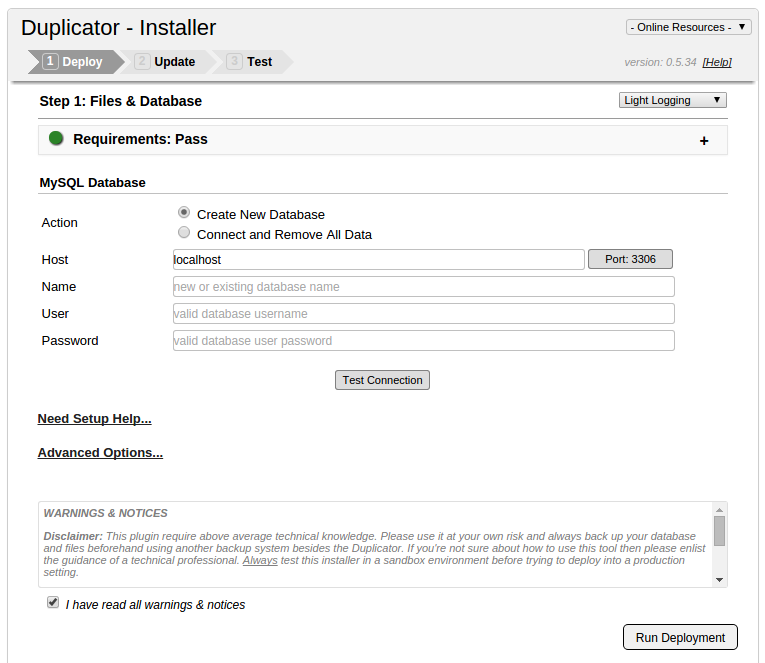
If your server meets the necessary requirements, you’ll see a Pass on Requirements with a little green circle.
In case you see a fail, it may be because you did not put the archive file in the same folder with the installer.php. You will want to expand the Requirement section by clicking on the little “+” symbol on the far right, then you’ll be able to see what the issue is. (See screenshot below)
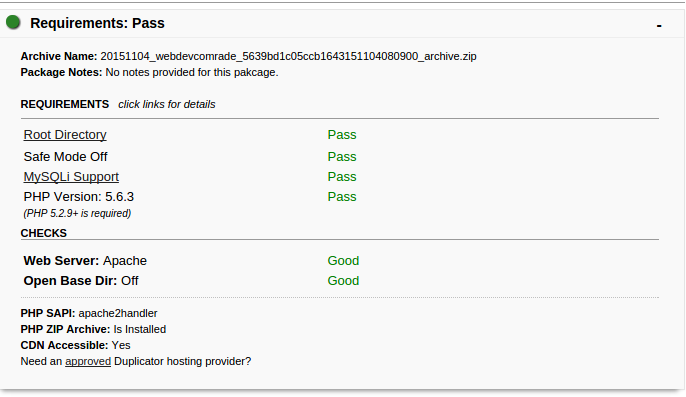
As seen from the screenshot above, if the archive files exists in the same folder, and the database and server are supported by the plugin, then everything should work out well.
In the MySQL section, you will be required to choose an Action. By default, the plugin creates a new database.
However, if you want to use an already existing database, you then choose “Connect and Remove all Data“.
Note: This action deletes everything in the database name you provide. So make sure, you really know what you are doing, I recommend letting the plugin create a new database for you.
After you’ve chosen an action, you’ll want to enter the following in the subsequent input fields:-
- Host: in most cases you’ll have to leave this field as it is, but it is not a guarantee, some hosts have different host name.
- Name: this is the name of your database. If you chose “Connect and Remove Data” as your action, then you will enter the name of the existing database you want to use, otherwise, you can type any name you want to give your database.
- User: this is the Username of your database.
- Password: this is again the password to your database. The Username and password are for database connection purposes.
Having provided the above required data, you can test your connection by clicking on “Test Connection” button below the Password field.
If the connection is okay, you can then proceed by reading through Warnings and Notice then check a little box below and then click “Run Deployment” button.
This will start the deployment process which includes creating a database and populating it with data.
Step #2 – Update
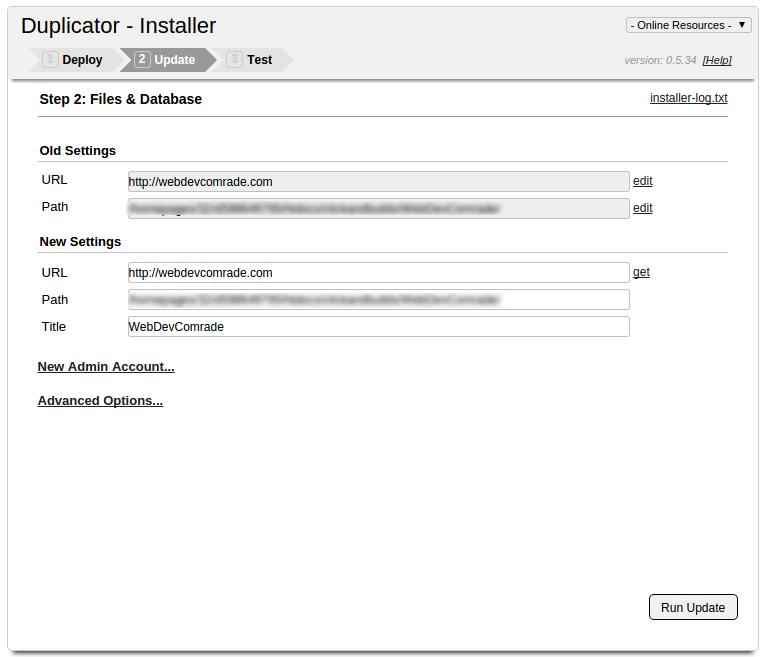
This step lets you update URL and Path of your website.
URL is what people type in their browser to to reach your website. wpchap.com for instance.
Path is the directory to your website files (the screenshot above is blurred for security reasons). For instance /htdocs/public/webdevcomrade, where webdevcomrade is the folder in which web files have been deployed.
If you are recovering your website to the same hosting account the backup was made from, you’ll not have to change anything.
However, if you are transferring your website to another host, you will want to change the path. And the URL, unless when you are changing your domain name to another, this can remain unchanged.
After updating your URL and Path, go ahead and run the update by clicking on “Run Update” button.
Step #3 – Test
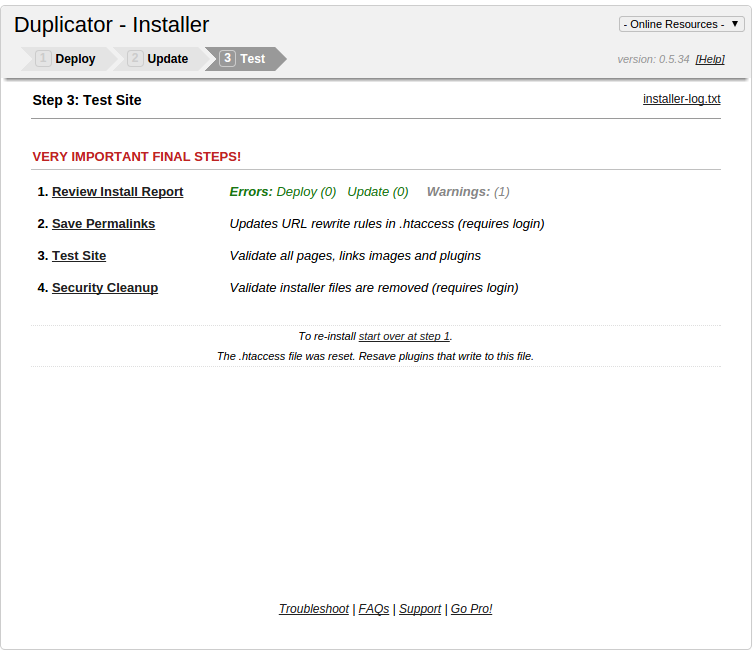
This is the final step of the recovery process. If everything went on well, you won’t see errors, however, some warnings can be ignored.
You should be able to test your website to make sure it is working properly. To test your website, you will click “Test site” link, third on the list. Another tab will open up and you’ll be able to see your website
If things went on well, and you’ve tested your website is fine. It is time to do security clean up. Click “Security Cleanup” from the list, you’ll be required to login.
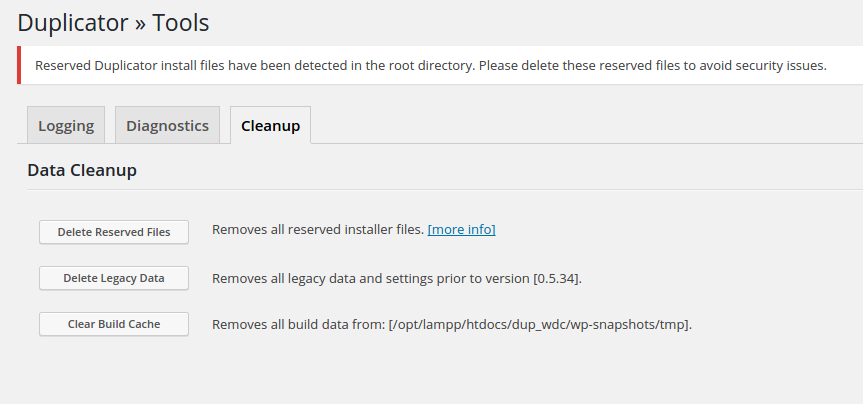
You then see a window like one in the screenshot above. Click on “Delete Reserved Files” button to delete all reserved installer files from the server.
This is an important step to perform, as the same information in these files can be used against your website by hackers.
Final Remarks
As easy as that. This is one of the quickest ways to deploy or migrate a website freely.
In case you have a problems restoring your backup, checkout the developers support center, or you can also post your issue below in the comment, and I will be happy to help.
For any comment and question, leave them below, I will be more than glad to read and respond.