After developing your beautiful website locally, the next thing you think of is, getting it online. But how do you get it there? You’ll want to upload your website files to the web server.
Here is an easy guide to help you upload or download files using FTP (File Transfer Protocol) client, Filezilla. By the end of the guide, you will be able to transfer files yourself between a web server and a local computer.
You’ll need to download and install FileZilla. If you haven’t downloaded this client yet, here is a link to download page, choose your platform, download and install.
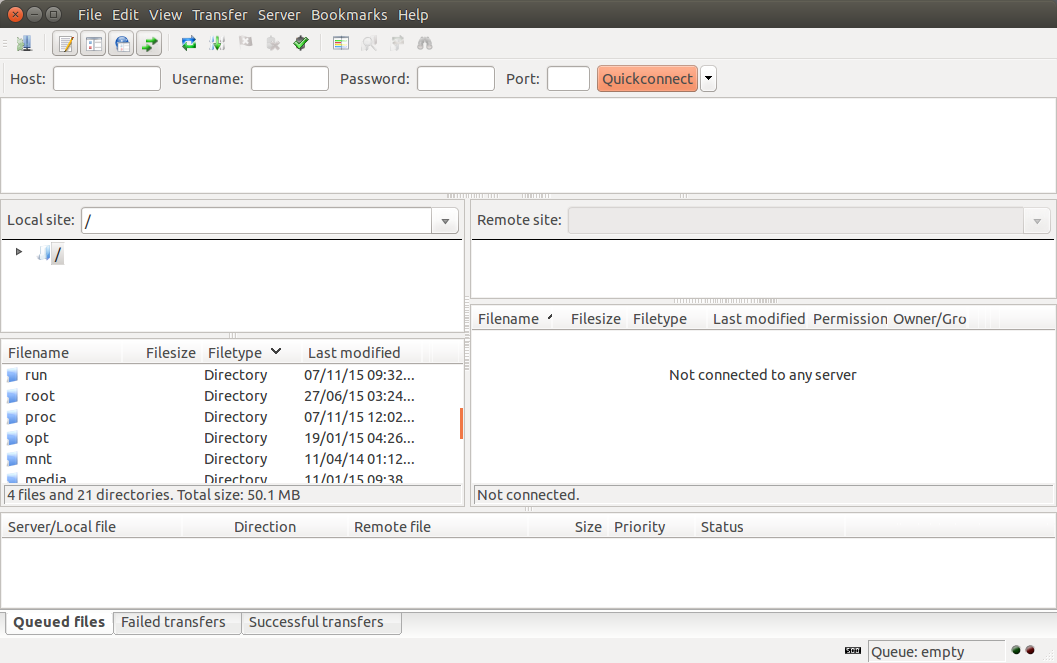
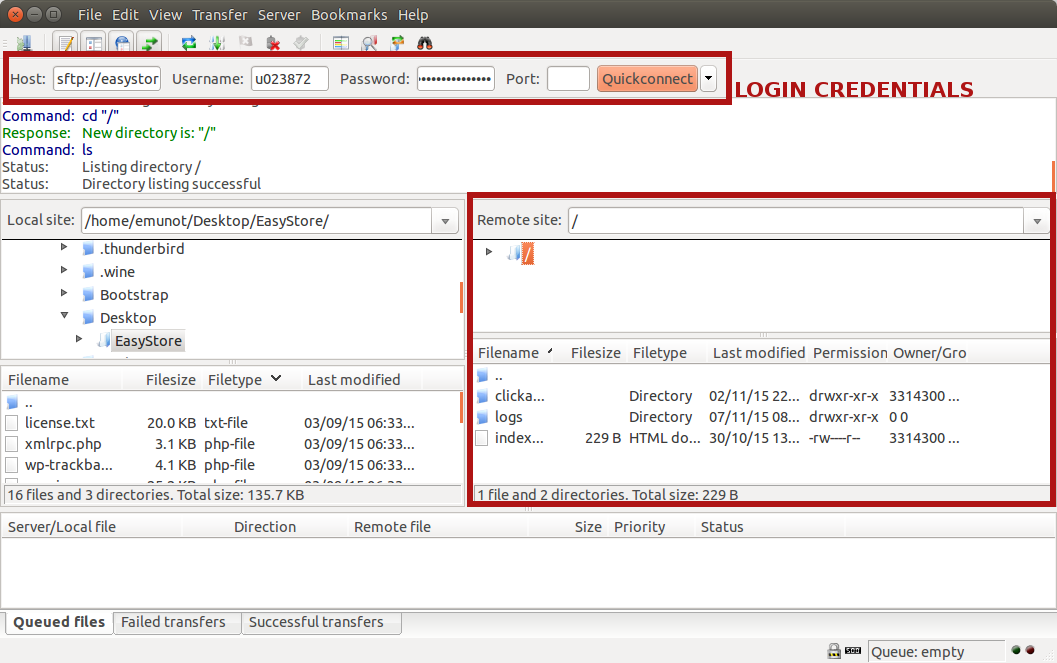
Start the program and you’ll have a window like one below, appear. I am using Ubuntu, however, there isn’t much difference with yours if you are using a different system.
FileZilla Overview
If you are using this client for your first time, it may seem confusing at the first glance. So, here is a quick review of FileZilla to help you get familiar with the tool.
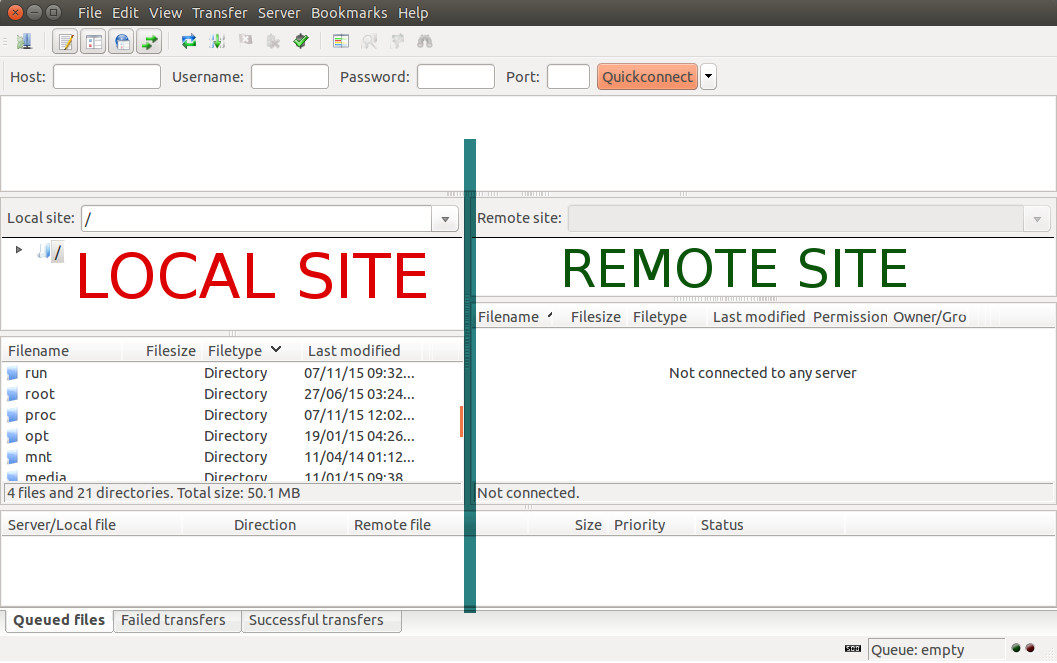
The Local Site Side
On the left hand side of the client, is where you find the directories to your local computer. You will be able to view files and folder on your local computer.
Assuming, the website files you want upload to the web server are on your computer desktop. You can type the path directly or you can expand the directory tree to locate the folder which contains your web files.
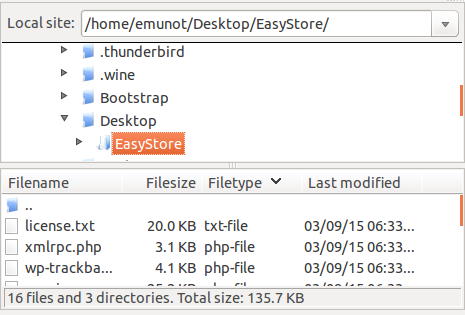
As you can see from the screenshot, the folder which contains the web files I want to transfer is called EasyStore, its located on the desktop.
And below it, you can be able to see the files inside the folder.
The Remote Site Side
This is the side which shows files and folders on the remote server. These files and folders will show up when you actually connect to the server.
As for now, you not see anything because you haven’t connect to any server yet.
Connecting to the Web Server Using FileZilla
Before connecting to the server, you will need to acquire an FTP account from your web host. Some hosting packages do not give an ftp account.
You may want to check with your hosting account if it provides an FTP account. Some hosting companies like 1and1.com provide a Secure File Transfer Protocol (SFTP) account which is secure compared to FTP.
To connect, type your:-
- Host: which is usually your domain name. sftp://easystore.co.ug or ftp://easystore.co.ug for instance.
- Username: this is the username for your ftp account from your host.
- Password: this is also a password of your ftp account
- Port: sometimes you don’t have to provide the host the port number.
So, fill your login credentials into the client and click “Quick connect”.
If the details you supplied to the client are correct, and you have a working Internet connect, the client should be able to connect.
As you can see from the screenshot above, you will be able to see the Remote Site side show up the folders and files presiding on your server.
How to Upload Files to the Server Using FileZilla
Now that the connection was successful, it is time to transfer files to your server account, and here is how.
a) You can transfer the files or folder to the server by clicking, dragging and drop the file/folder from the Local Site side on your left, into the remote folder.
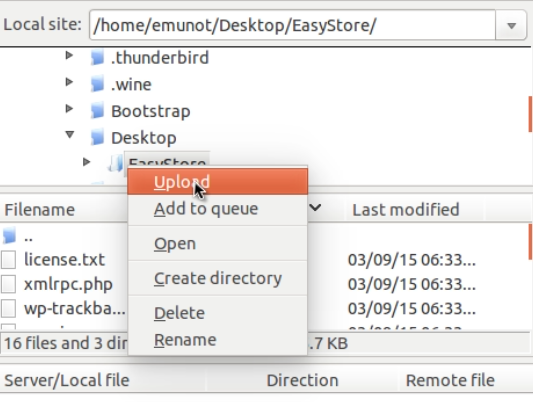
b) Or you can right click on the folder or file you want to transfer, and choose “Upload” from the options that show up. See screenshot below.
But, make sure you have already clicked and opened the folder on the server, you want the files to be transfered into.
Remember, the same procedure can be followed to either upload a single file, an image for example, or an entire folder.
For instance, in my case I upload the entire folder ‘EasyStore’, but you can upload a single file as well by right clicking on that file and click ‘Upload’ or simply drag the file into a remote folder on the server.
Soon after dragging and dropping the file or clicking Upload, the process of transferring your file will start.
And, depending on the size of the files you are transferring, you may have to wait for a while until and the client will notify you once the file/files have all been transfered.
How to Download Files from Server to Local PC using FileZilla
Similarly, the same procedure can be followed when you want to download a folder or file from the server to your local computer.
Which is:-
a) Clicking and Dragging the file or folder from the server, and dropping it to your local folder.
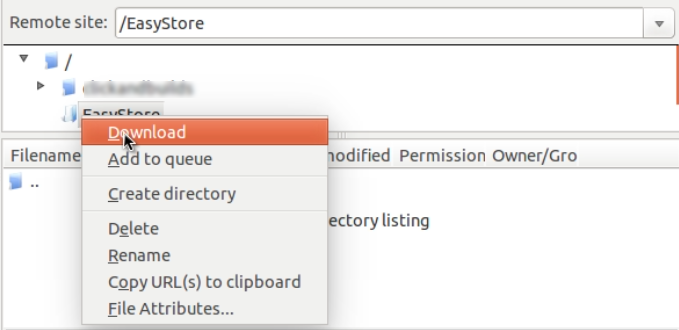
b) Or right clicking on the file or folder you want to transfer from the server, and clicking Download (See screenshot below) from the options that appear making sure, you already selected the folder you want the file to be downloaded to, from local folders on local site side.
The process to download your files will begin and depending on your size of the files and your network connection, you will have to allow some time for the files to download.
Final Remarks.
Transferring files between your server and computer shouldn’t be complicated to you by now. However, if there is anything you feel not explained properly to you, feel free to drop me a comment below and I will be able to help.
Any comments and questions are welcome, leave them below and I will be more than happy to read and reply to you. Happy file transfer!