Looking to migrate WordPress site from localhost to server?
I understand, this can get tricky and confusing, especially for beginners.
I will guide you step-by-step on how to migrate WordPress site from localhost to a server.
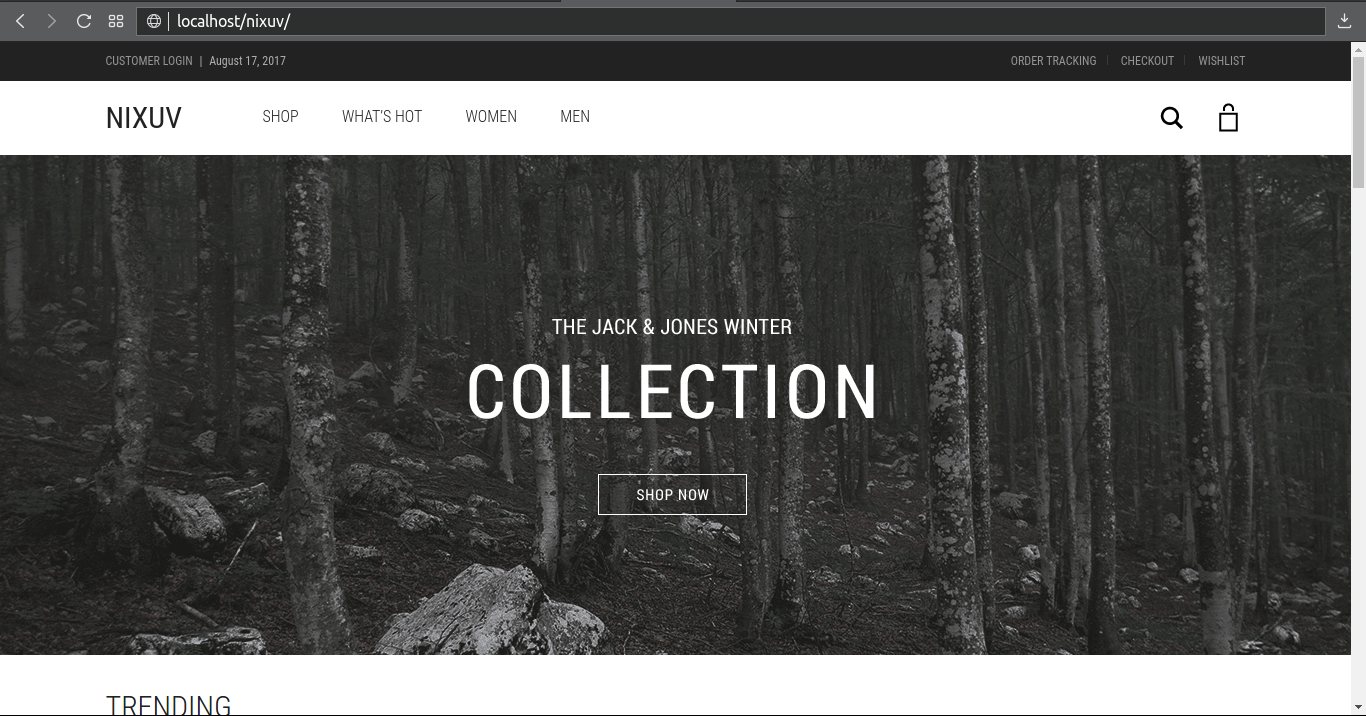
In this guide, I will show you how I move a local WordPress site “nixuv” from my localhost server to a live server.
Here’re requirements you’ll need to get the job done.
- FTP login credentials to your server.
- FTP Client such as Filezilla
- MySQL database access
- Text editor like sublime text (optional)
I am going to show you two ways you can migrate a WordPress site to a server.
One of the ways requires using a plugin (simple), the other doesn’t require any plugin.
However, both methods require you to manually create a database.
Create a mySQL database
So, create a database on the server that you’ll be migrating your WordPress website to.
Unlike on the localhost, most hosting providers won’t allow you to create a database from phpMyadmin.
You will have to create your database from the cPanel or WHM.

During the process, you’re required to create a new database user as well.
Store database name, username and password you just created because you’ll need to use them shortly.
Method I: Migrate WordPress site from localhost to server using duplicator plugin.
This is by far the quickest and easier way to migrate to a live server.
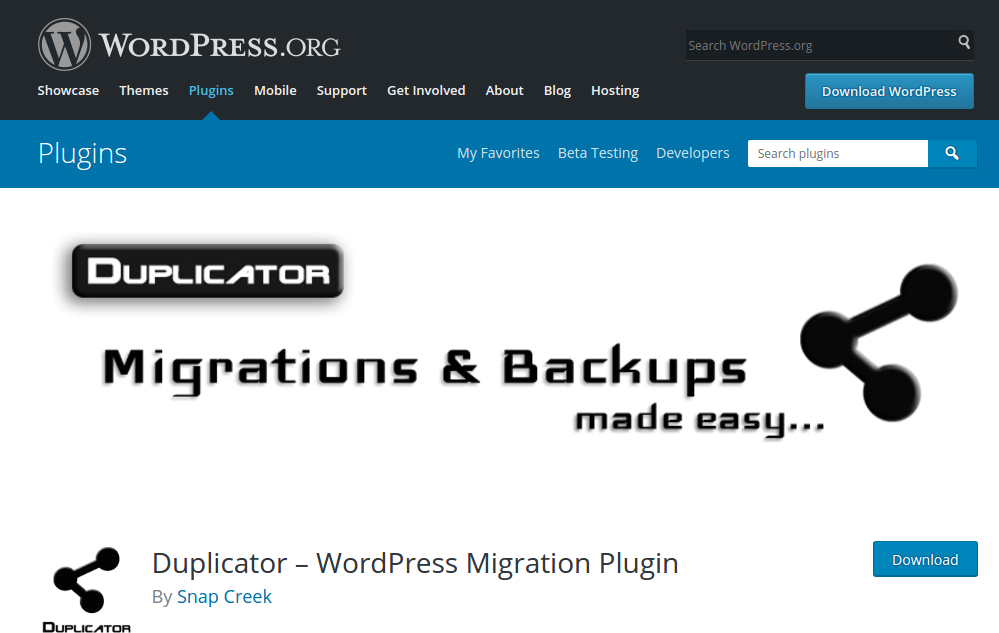
Duplicator plugin by Snap Creek makes the job much easier.
This method is great for beginners as you’ll see.
Download and install duplicator plugin
If you can’t automatically install plugins from your dashboard on localhost.
Then you’ll have to download and install the plugin manually.
Download the plugin from WordPress plugin repository
Next, install the plugin to your local WordPress website.
To install the plugin, extract plugin content into “wp-content/plugin/” folder.
You can now login into the dashboard to activate and use the plugin.
Create a new package
Duplicator plugin collects WordPress files for you, and makes a package that will be installed on the server.
So, let’s create a new package from our local WordPress website.
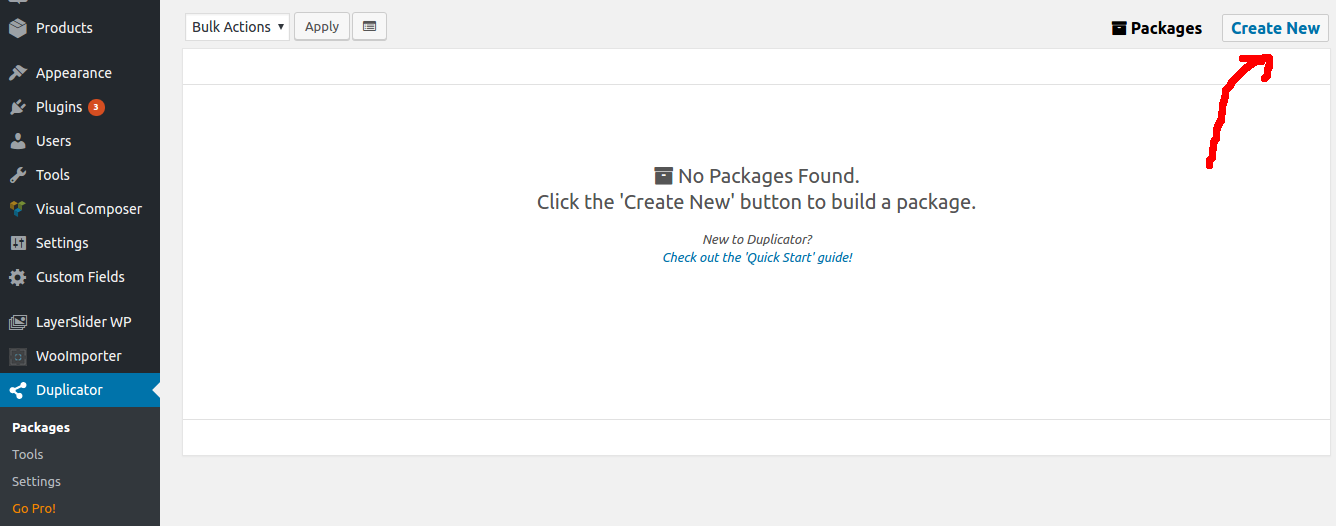
From admin dashboard, create a new package.
Click Duplicator from menu items, then click on the “Create New” button.
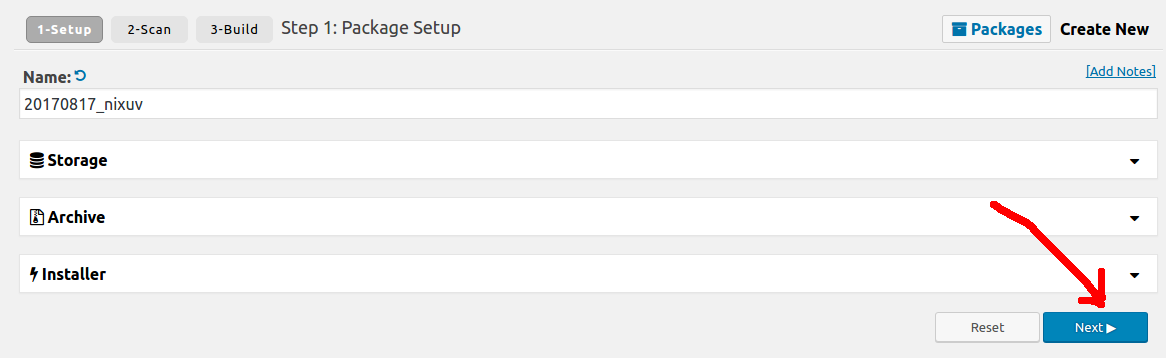
If you would want to change some default settings, click on an item and it will expand.
There’s nothing much to do here, click on “Next” button to proceed.
Now, the plugin will attempt to scan you local website.
When everything is fine, you should see a similar screen like one below.
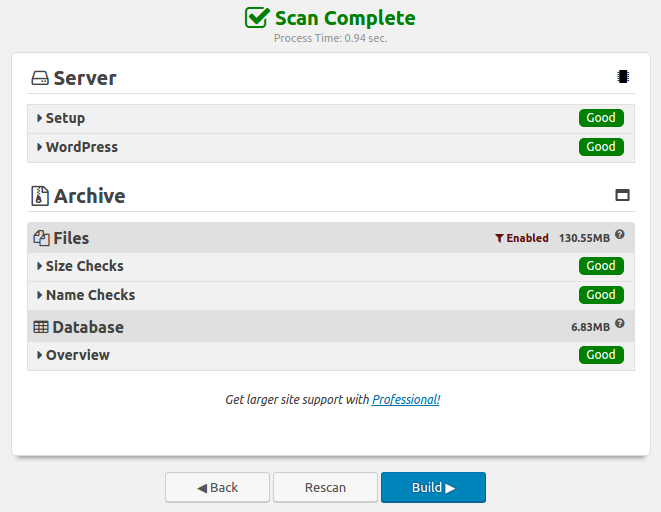
You might see some warning notice after scan.
Unless, it’s a serious warning you may want to ignore the warning and just proceed.
Let’s proceed.
Click “Build” button to start building the package.
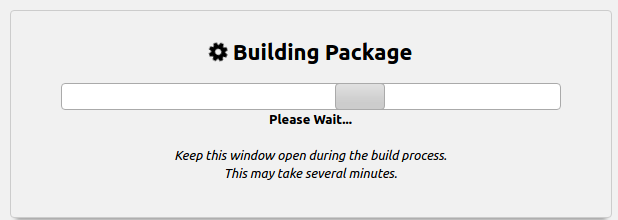
This might take some time depending on the size of your website.
But not very long though, so don’t grab a cup of coffee yet 🙂
Package building should be complete when you see this…
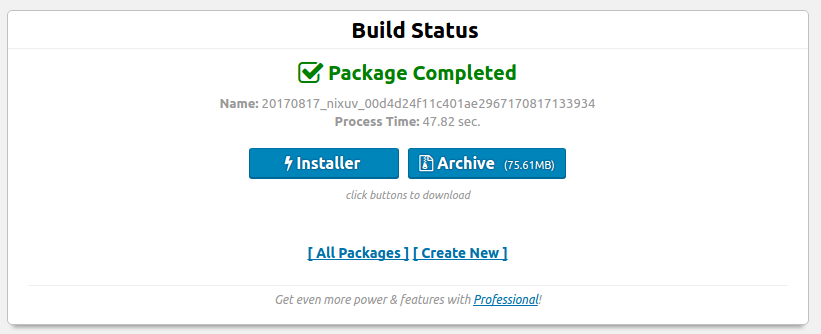
Next..
You will download the “Installer” and “Archive” files.
Just click on the respective buttons to download them.

You should have them stored on your computer hard-drive now.
So, were now going to..
Transfer package and installer files to server
Using any FTP client, transfer the downloaded files to the server you’re transferring your WordPress website to.
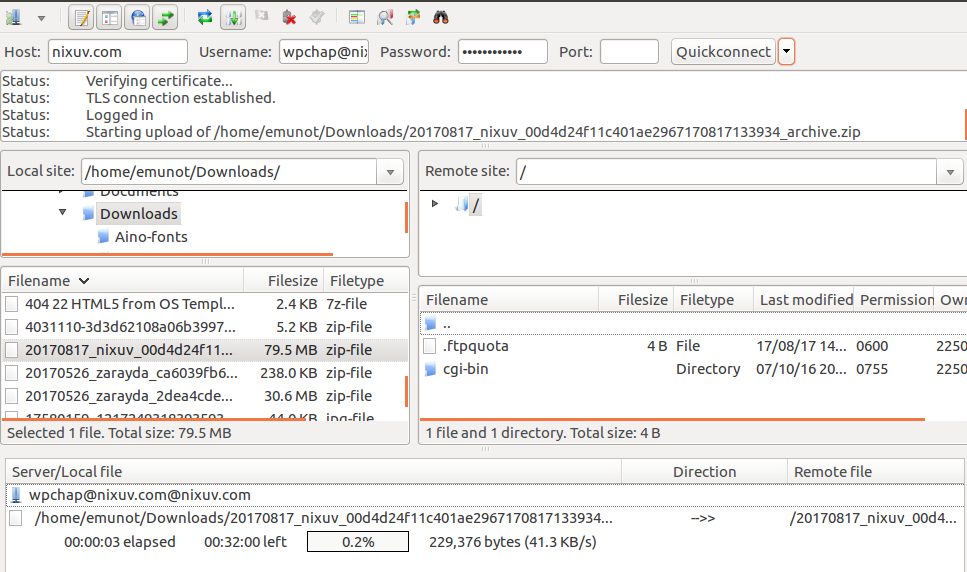
As you can see from the screenshot above, you’ll have to transfer the archive and installer.php file to your server.
Next…
Run the installer.
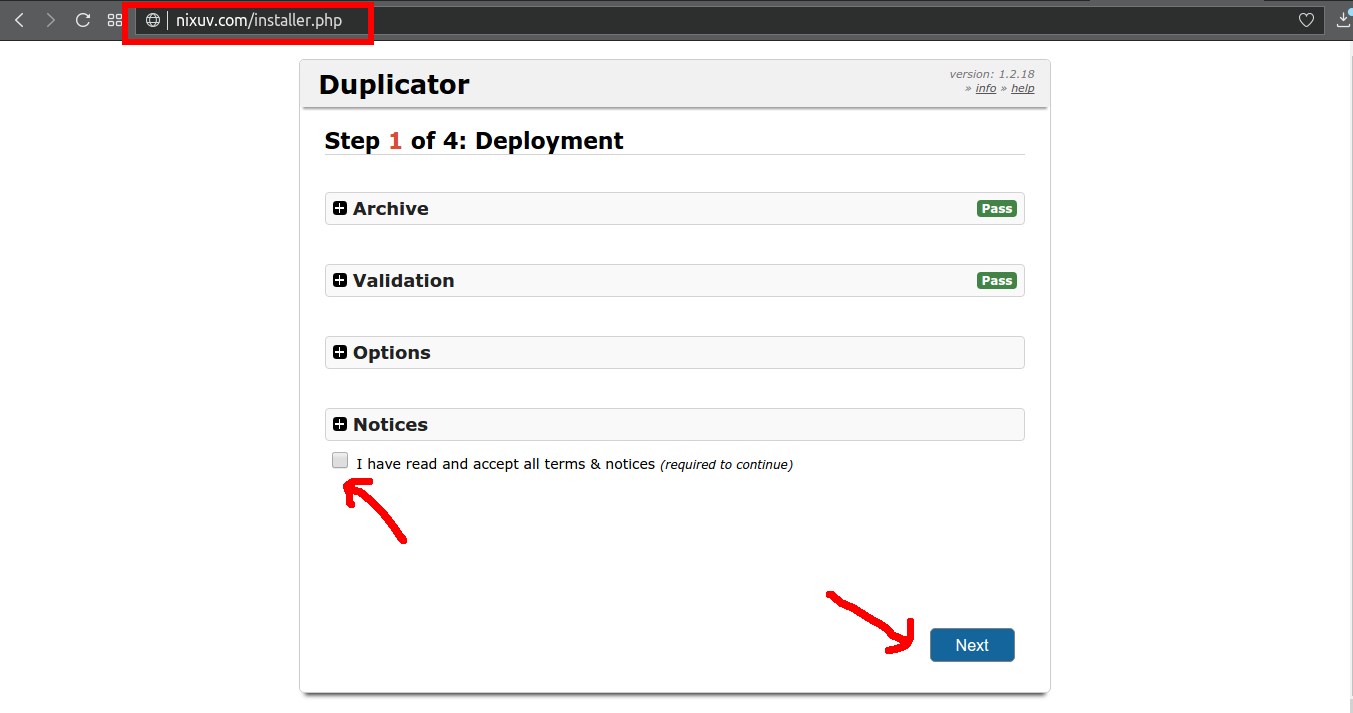
To start the installer, type your website url forward slash installer.php.
That is to say; your-website-url/installer.php.
For example “nixuv.com/installer.php”.
When you see a screen similar to image above, check the box to accept terms and hit “Next” button.
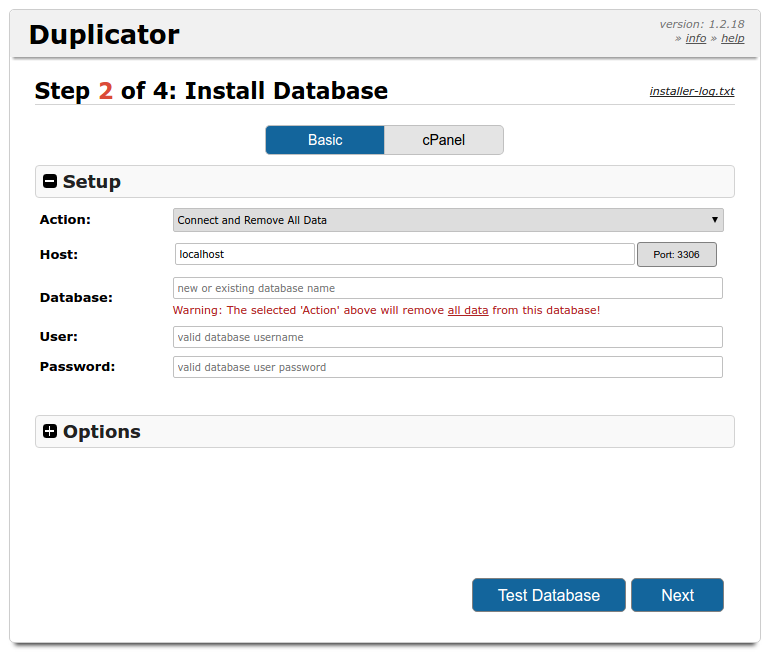
The next step is to fill in your database name, database user and password you store in “Create mySQL database” step we did earlier.
If you haven’t created a database yet but have database username and password.
You can let the plugin create a new database for you by clicking on “Action” and choosing “Create New Database“.
You can test your database connection by clicking on “Test Database” connection.
Then, click “Next” to begin the installer.
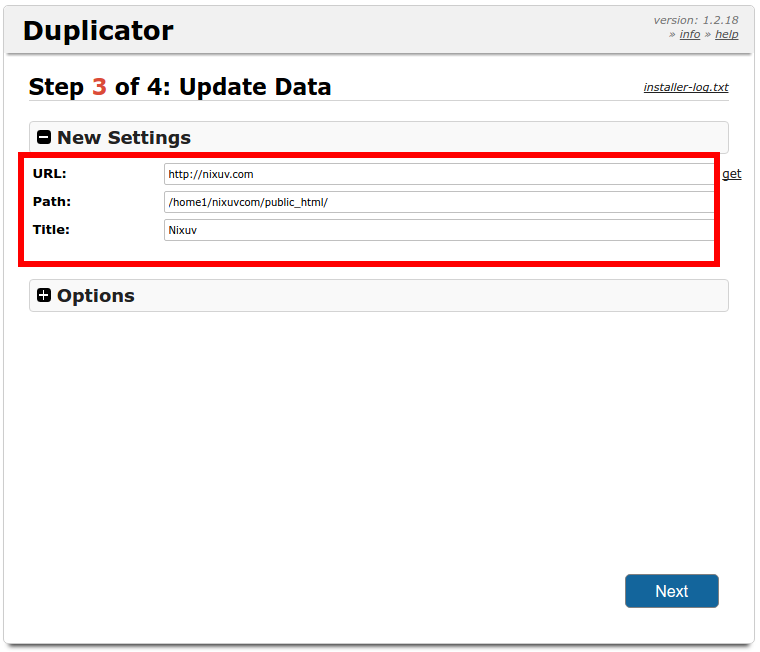
The beauty that comes with using Duplicator plugin is that it takes care of the new urls for you.
So you don’t have to change urls in the database yourself.
The plugin is wise enough to detect your new website url and auto-populate the fields.
You may only change those fields in case you see a wrong url, otherwise all you have to do is hit “Next” button.

The installer will finish updating the database and you should now be able to login into your website.
Finally, you now want to clean up by deleting installer files on your server.
Click on the “Site Login” button.
Then log into your WordPress dashboard on the server.
Use the old logins from your localhost WordPress site.
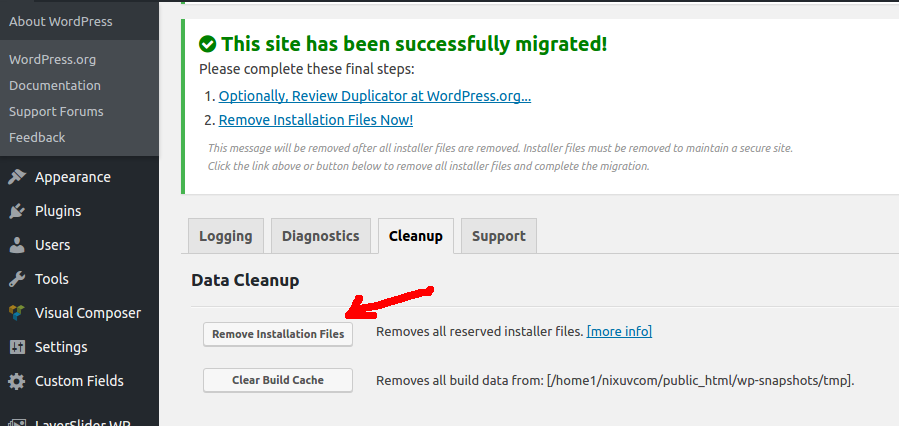
Click on “Remove installation files” button.
And…
That is it!
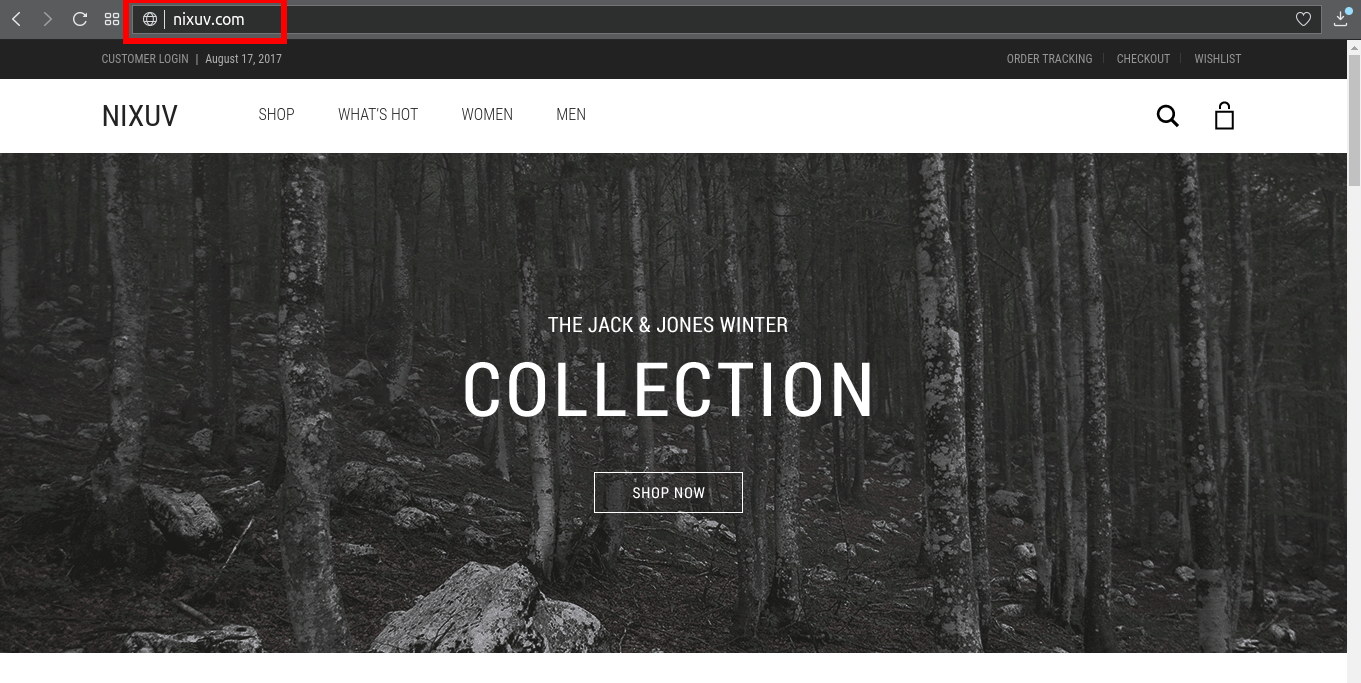
Visit your website on the webserver address and..
You’re live, congrat!
You just did Migrate WordPress site from Localhost to Server as much as I did for nixuv.com.
Still confused?
Watch a quick overview of WordPress Duplicator plugin video below.
Method II: Migrate WordPress site from localhost to server without using plugin.
This a less preferred method. But it is not complicated either.
The beauty of using this method is that you don’t have to depend on any plugin to migrate WordPress site from localhost to server.
Let’s dive in..
You might want to copy your local WordPress folder to another location like on desktop.
This allows for quick access and have an original copy when you..
Edit wp-config.php file
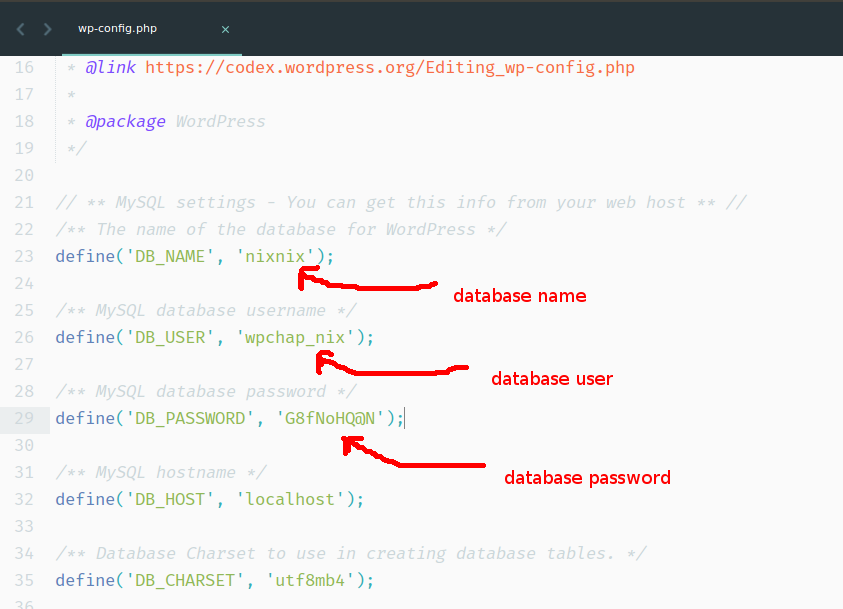
Using your preferred text editor.
Open “wp-config.php” file and change database name, user and password.
Replace them with what you created in Create a mySQL database step above.
Don’t you dare copy my password 😉
Next..
Connect to the server using FTP client
Connect your favorite FTP client to your server.
Cyberduck is great for Mac computers
I will just use Filezilla in my case.
If you choose Filezilla too, take a look a Gif below..

That is me connecting to ftp 🙂
Should give you an idea on how to connect to ftp server using Filezilla if you didn’t.
Transfer WordPress files to the server
Now that you just connected to the server.
Upload all your WordPress files to the server including the “wp-config.php” file you just edited.
Export WordPress database using PhpMyadmin
Connect to your phpmyadmin on your localhost.
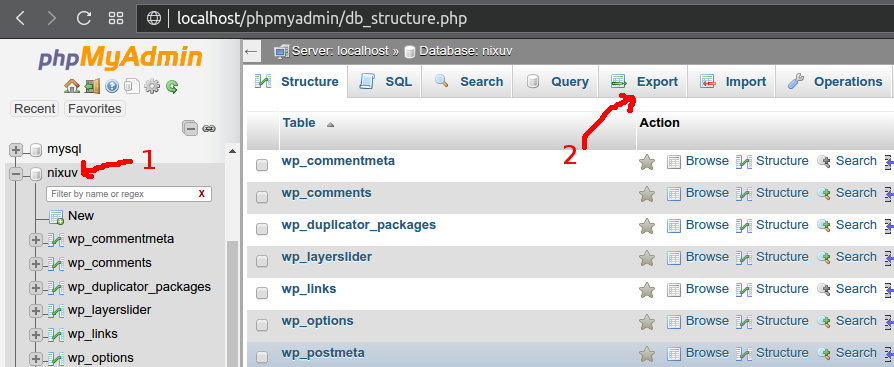
- Choose the database, that is containing your local WordPress files.
- Click “Export” from the options above.
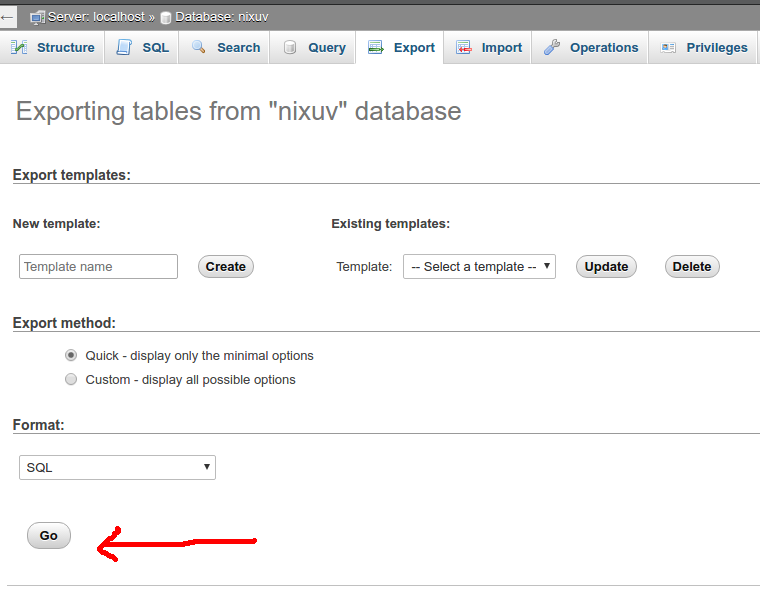
On the next screen, make sure “Format” is SQL and click “Go” button to begin export.
Search and replace all URLs in SQL file.
After exporting your database.
Locate it under downloads and open it with your a text editor.
You may need a powerful text editor especially if your database is huge.
Now search “localhost” or “127.0.0.1” and replace it with your website url.

On Sublime Text 3, this is as easy as pressing and holding “CTRL + H” on a PC or “CMD + H” on Mac.
Then clicking “Replace All”.
But you have to be careful…
Because sometime you may have a word “localhost” in your blog or page content.
So, you end up replacing pieces of your website content with your website url.
However, it’s unlikely that you have “localhost” or “127.0.0.1” in your content.
So, go a head and replace all anyways.
And save your sql file.
Import SQL tables to server using PhpMyadmin
There are better tools like MySQL Workbench or Sequel Pro for Mac that can do the job.
Feel free to use any of these tools as long as you know how to use them.
For the purpose of this guide, I will stick to using phpmyadmin.
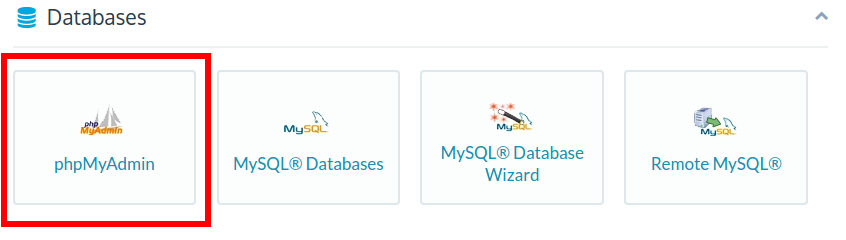
So, log into your phpmyadmin.
Import sql dump you just edited into the database you created in the “Create a mySQL database” step above.
Inside phpMySQL, click on the database name to select it.
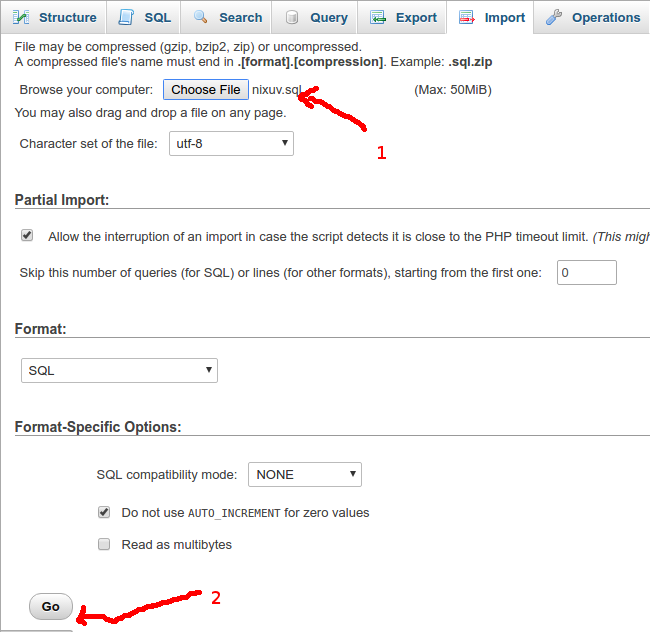
Click on “Import” from options above.
- Select .sql file you just edited.
- Click “Go” button to start importing tables.
After successful database import, you can now..
Visit your website – you’re done!
Everything should work now.
Troubleshooting
If you’re like me…
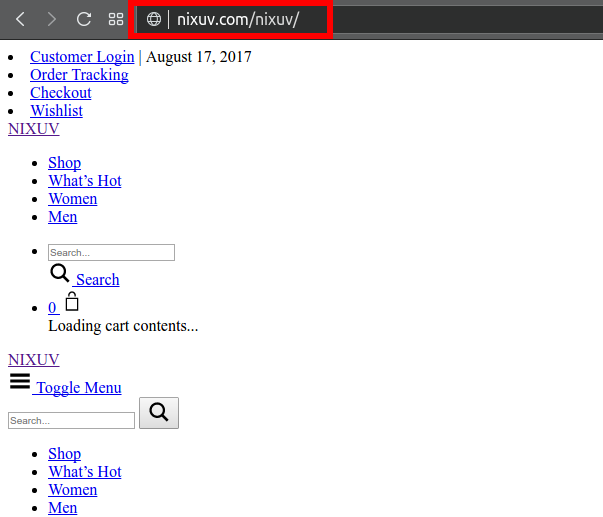
You may notice that when you try to visit you website url, it redirects to a different url.
In my case am being redirected to “nixuv.com/nixuv”.
This is because from localhost, site url were set to “127.0.0.1/nixuv”.
“nixuv” being WordPress folder.
So, during the “Search and replace” session only the IP address was changed.
The fix…
You could do this via WordPress dashboard, but you can’t even login.
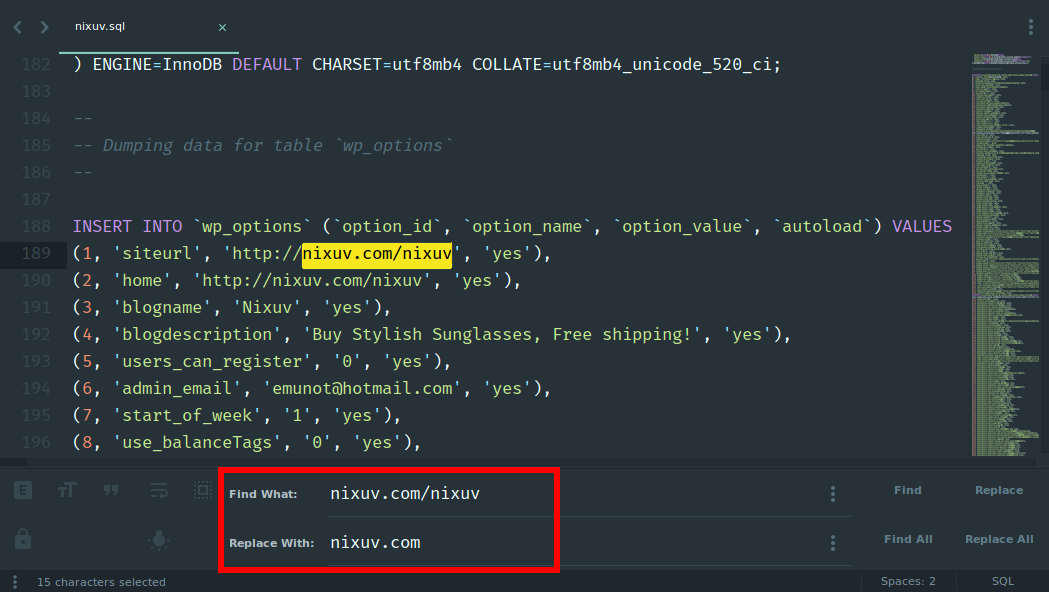
The fix is to search the redirecting url (nixuv.com/nixuv for my case) in SQL file.
And replace it with correct web server URL.
Save, and..
Then re-Import SQL tables to server using PhpMyadmin once again.. 🙂
Now visit your web url…
Bingo! You did it!
Migrating WordPress site from localhost to server shouldn’t be difficult anymore.
If you’re facing any kind of trouble trying to migrate WordPress site from localhost to server…
Post it in the comment box below
Oh! and by the way…
Feel free to share your new website URL in comment box below and I will pay you a visit. 😉
You can as well share with us which method worked for you.
Is it Method I: Migrate WordPress site from localhost to server using duplicator plugin
Or Method II: Migrate WordPress site from localhost to server without using plugin. ?
Happy WP migration 🙂