In this tutorial I show you how to create a custom header and footer for your WordPress website using Elementor page builder. This tutorial demonstrate how you can achieve this with and without Elementor Pro.
How to Create Custom Header or Footer Using Free Elementor
If you do not have Elementor Pro, creating custom header or footer is still possible using free Elementor page builder with another plugin.
Step 1: Install and activate following plugins
You need to install and activate these plugins to be able to create your custom header or footer.
I assume you already installed Elementor plugin, if you haven’t installed Elementor then first install Elementor before moving forward.
Header, Footer Elementor plugin
Header footer plugin is one must-have plugin if you want to create custom header if you don’t have Elementor Pro.
Here’s how to install Header, Footer elementor plugin
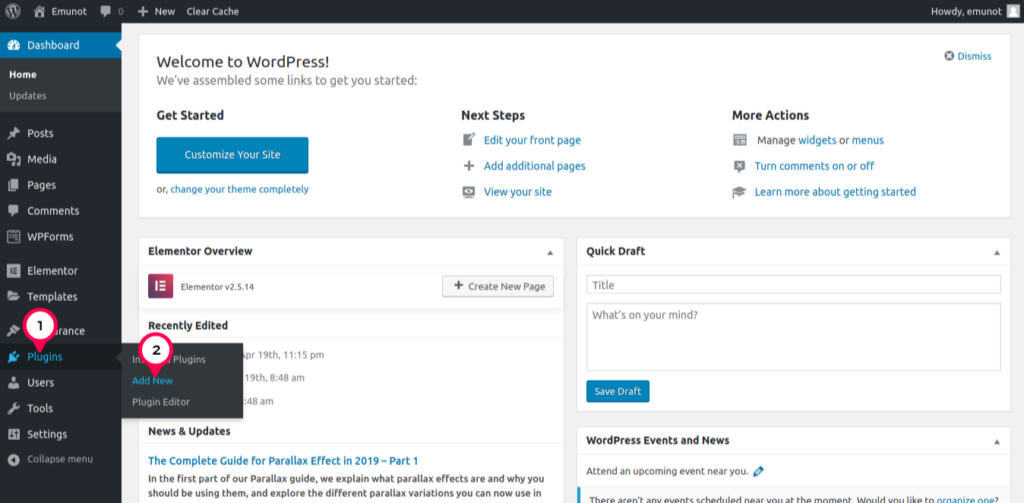
Log into your WordPress dashboard.
- Hover your cursor on Plugins
- Click “Add New”
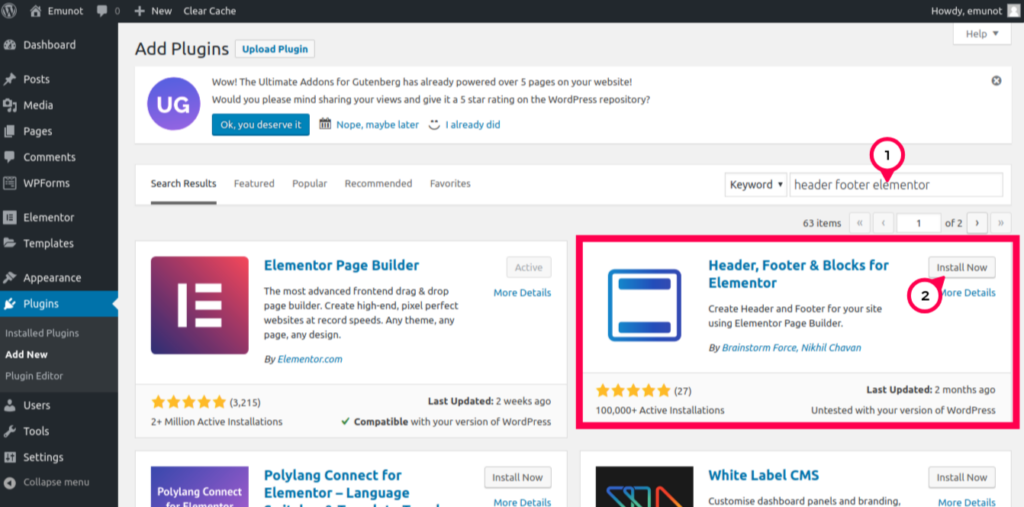
Now search and install the plugin
- In search field, type “header footer elementor”
- Click “Install Now” to install the plugin
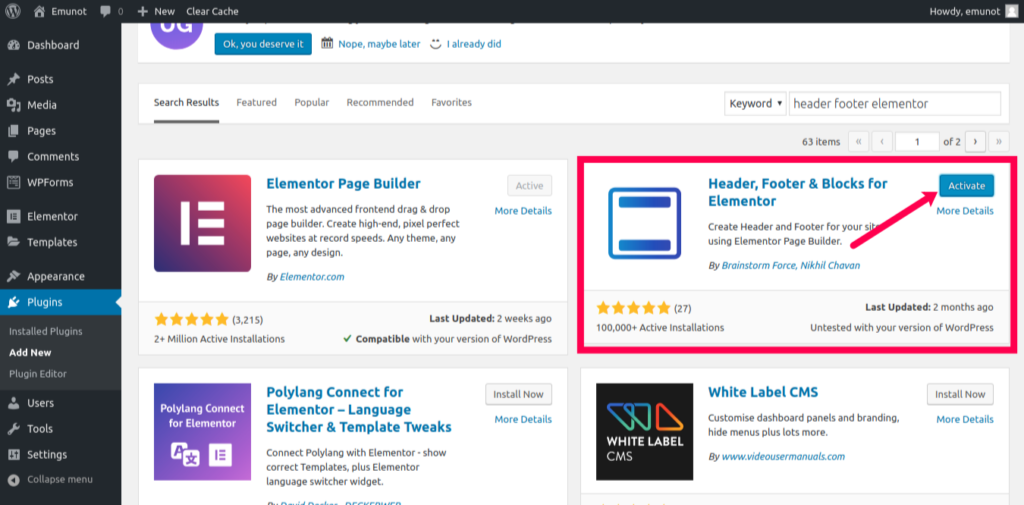
Activate the plugin by clicking “Activate” button
NavMenu Addon for Elementor plugin
This is the second plugin you need to install and activate before you can start making your custom header or footer.
This plugin adds more widgets such as a menu widget to Elementor widget library which is why you need since nav menu widget is not available in free Elementor plugin.
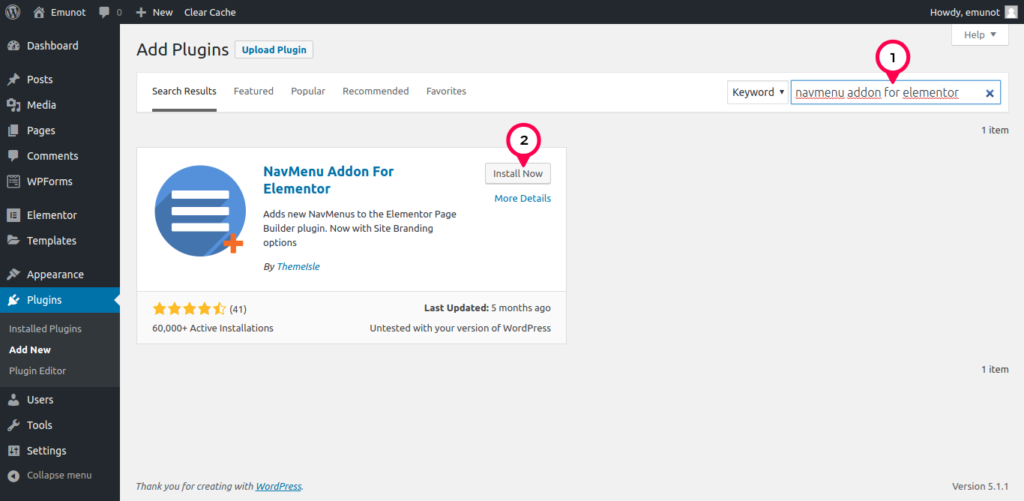
Again, from your “Add new plugin” page, search and install NavMenu Addon for Elementor.
- Type in the search “navmenu addon for elementor”
- Then click “Install Now” button to begin installing the plugin. Once installation is complete, click “Activate” to activate the plugin.
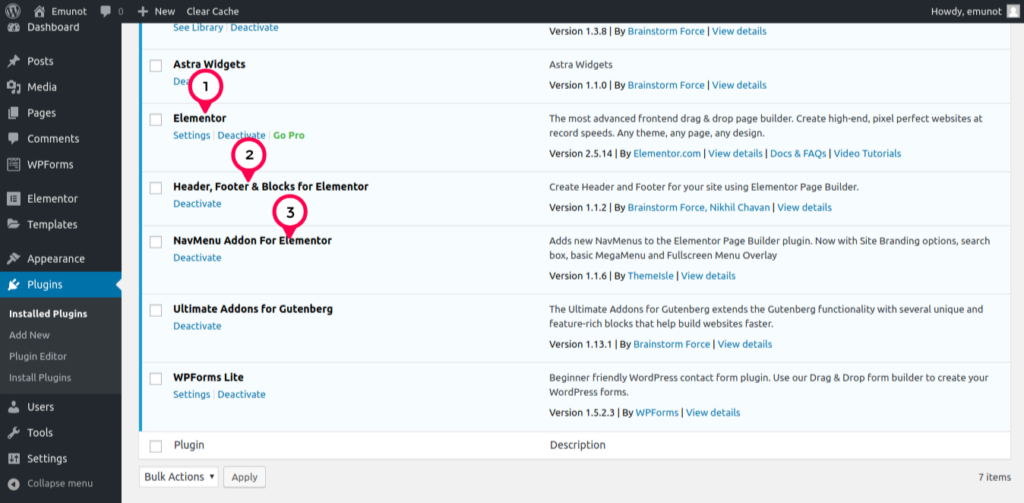
You should now have a total of 3 plugins; Elementor, Header, Footer & blocks for elementor and NavMenu Addon for Elementor.
You should now be ready start making custom headers and footers.
Step 2: Create Custom Header
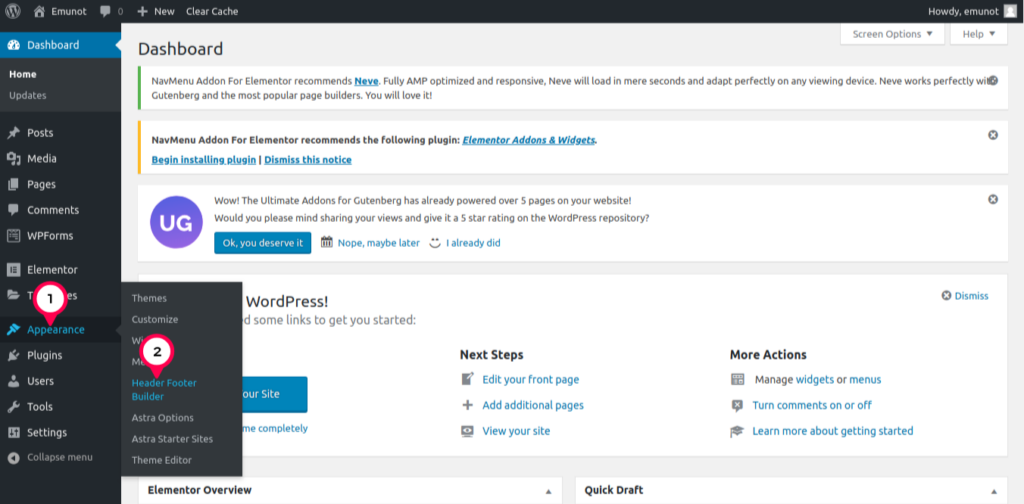
To begin creating a custom header, start by…
- Hover on “Appearance”
- Click on “Header Footer Builder”
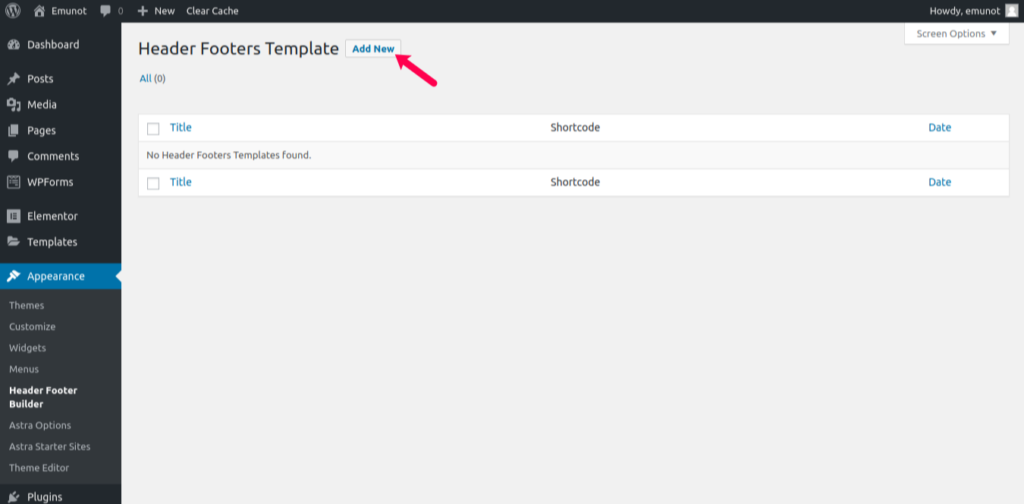
Click on “Add New” button to create your first header or footer.
In this example I am going to demonstrate how you create a header, however, you can follow similar steps to create a footer.
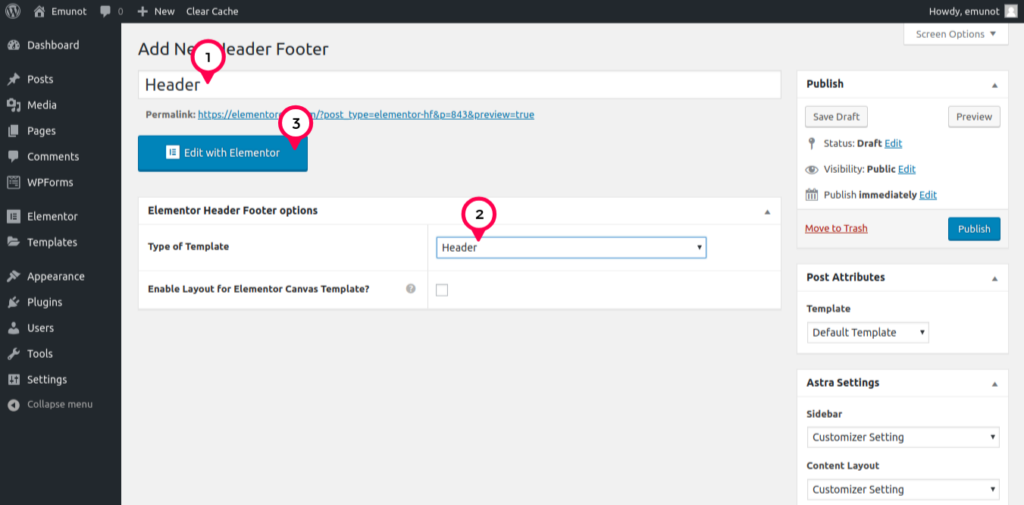
- Add a title to your header. In this example I’ll just name it “Header” since I am creating a header. I would name it “Footer” if I was creating a footer.
- Select a type of Template. Choose Header when creating a header or “Footer” when creating a custom footer.
- Edit your header in Elementor by clicking “Edit with Elementor” button. You might wan to first save a draft before clicking edit with Elementor because sometimes the changes you just made have not yet been saved.
Edit Header in Elementor
You should now be ready to start editing your header in Elementor.
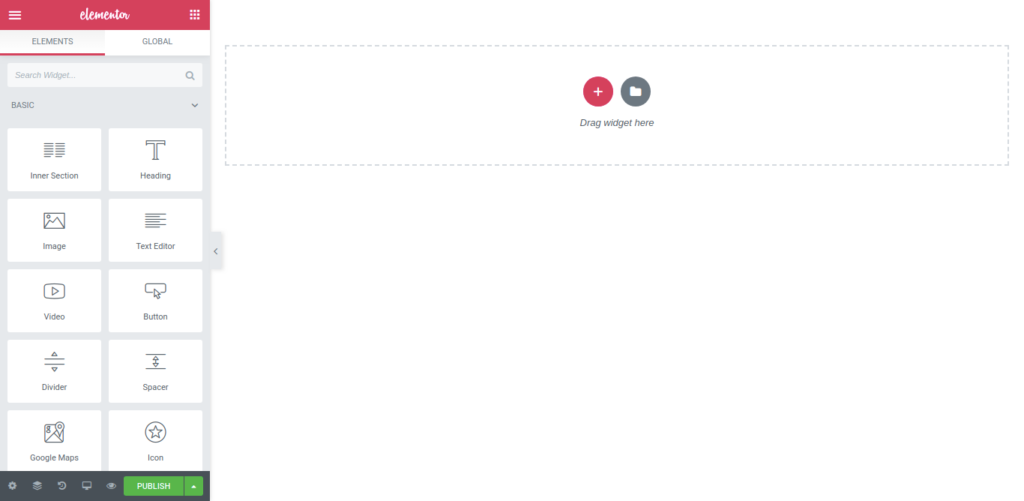
From the previous step, you should see a blank screen similar to one in the screenshot above.
You can now start creating sections and columns as you wish your header to look like.
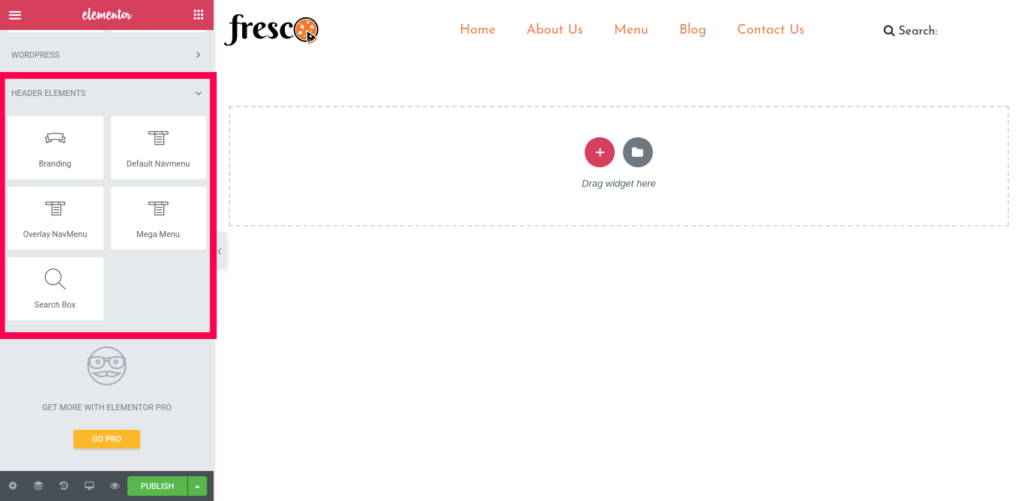
On top of free Elementor widgets, you should now see a new set of header elements when you scroll to the bottom of widgets on the left panel.
Use these elements to build your header. Here you will find “Branding” which is your site name or logo plus various menu elements which you use to add a menu to your site.
Don’t forget to switch to mobile and tablet view to see and edit how you want your header to look like on small screens.
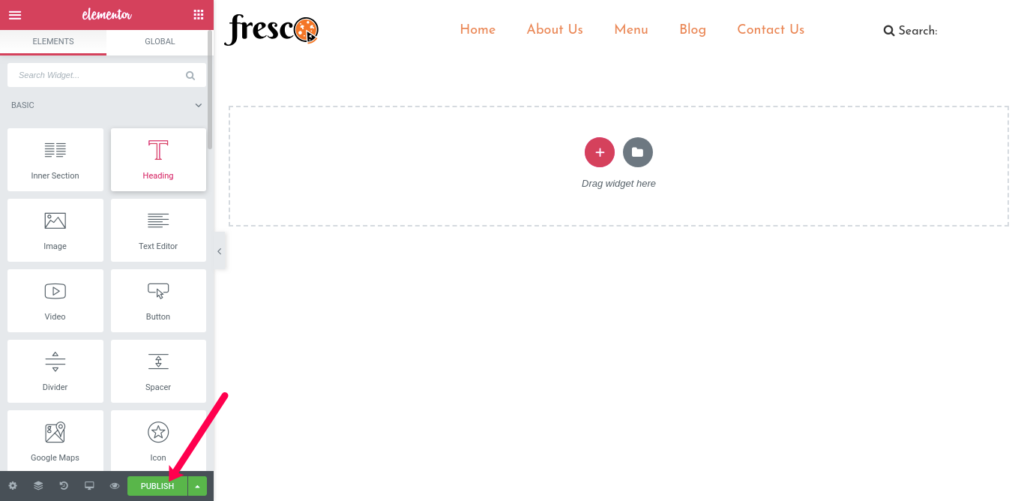
Once you’re done editing your header, click “Publish” button to publish your header.
Your new designed header should now be live across your website replacing the default theme header.

How to Create Custom Header or Footer Using Elementor Pro
If you have Elementor Pro, creating custom header or footer is simply a breeze because this feature is already available for Pro users.
Follow these steps to create a custom header.
Step 1: Create a new Header template
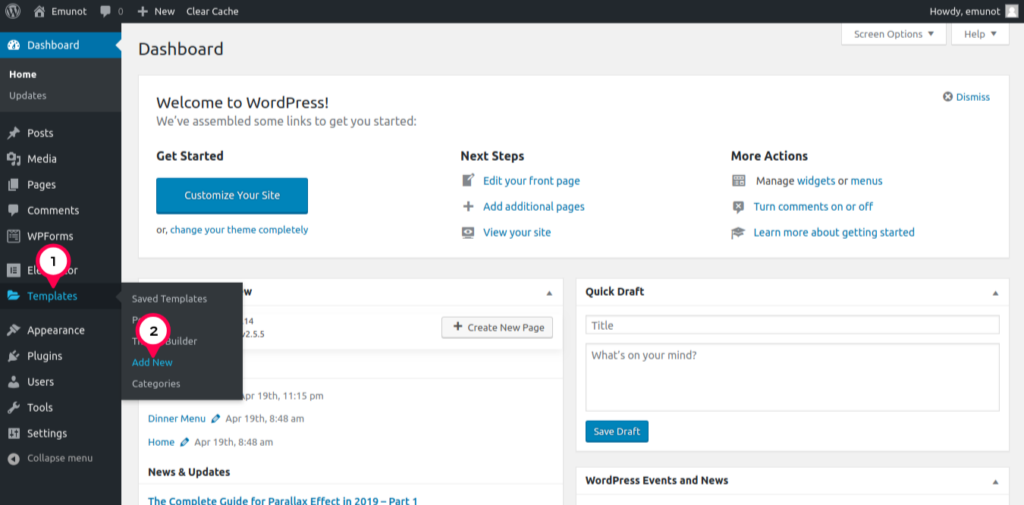
Log into your WordPress dashboard
- Hover on “Templates”
- Then click on “Add New”
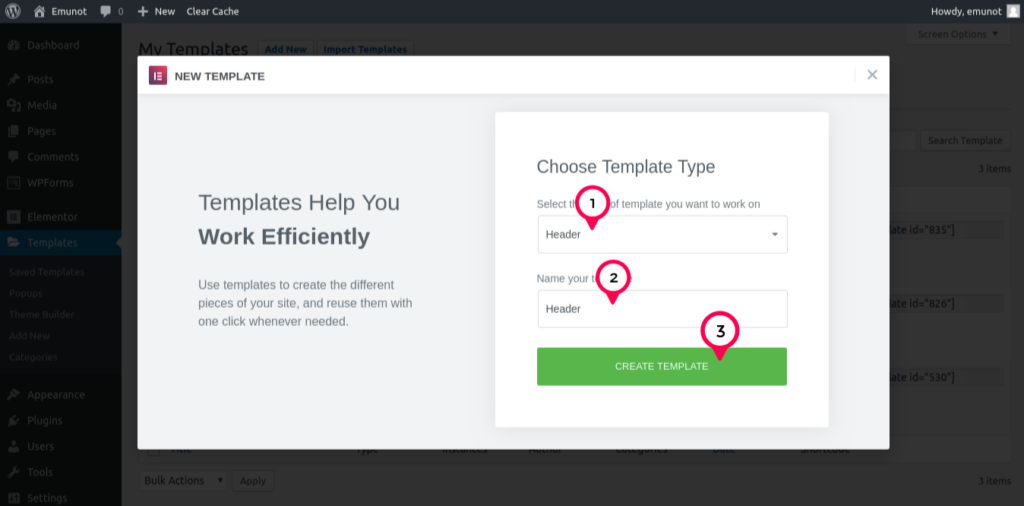
The next step is to choose a template type plus giving a template a name.
In this example, I will be creating a header, however, you can follow these steps to create a footer too.
- Select template type, I have selected “Header” because I am creating a header.
- Type in a template name. I have named mine “Header”
- Click “Create template” button.
Edit Header in Elementor
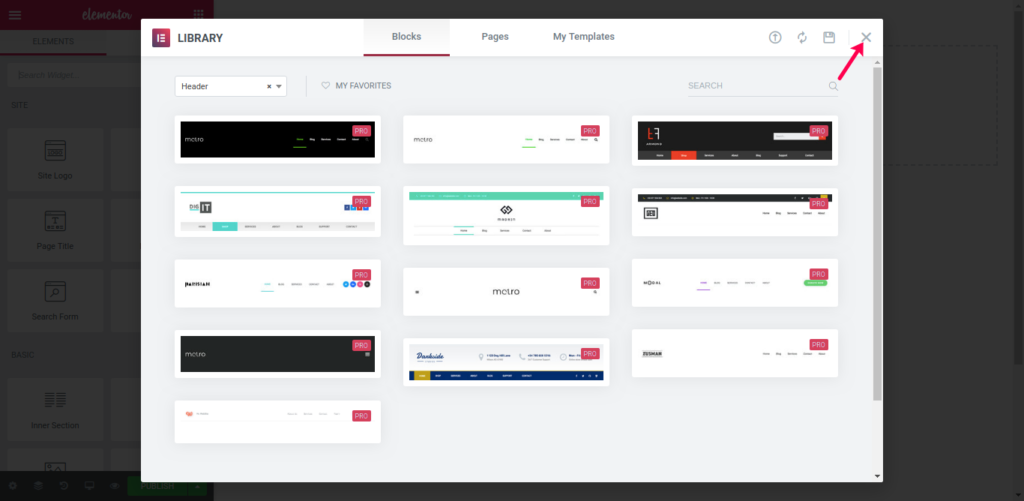
Following the previous action from last step, Elementor gives you an option to use pre-made headers which you can modify to tweak around to suite your style, or create yours completely from scratch.
To create from scratch, close the popup window by clicking an “X” icon on the top right.
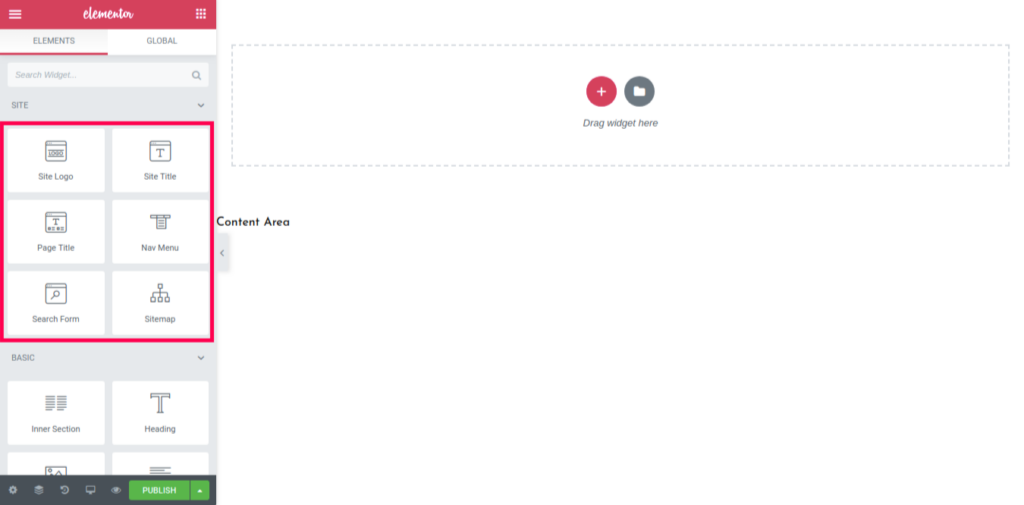
Now you will notice that unlike free Elementor, you now have header widget elements on the left panel.
You use elements such as Site Logo, Nav Menu, etc to create your header. You still have all the other elements such as social media icons available for use as well.
You also have an option to edit your header on smaller screens such as mobile and tablet to make sure your header is responsive and displays well on all devices.
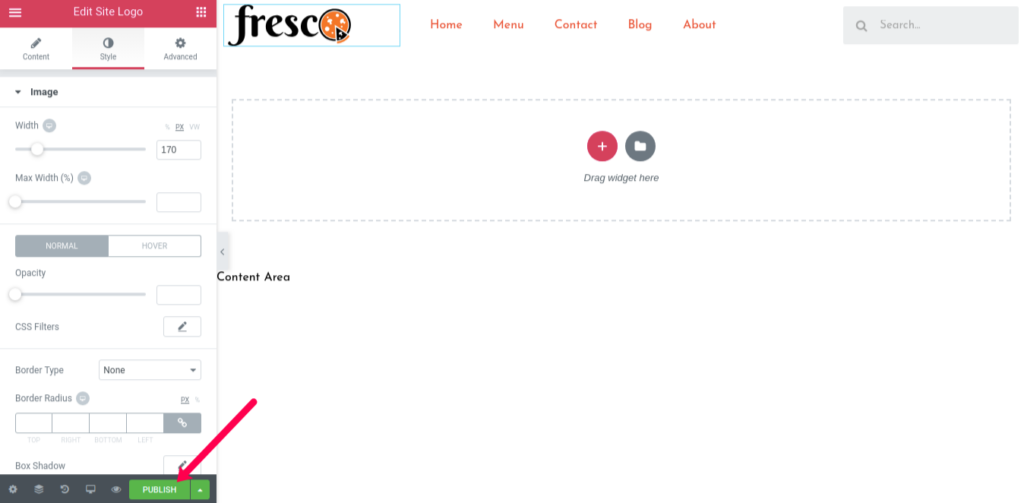
After you designed and developed your header and you’re ready to publish it, click on “Publish” button.
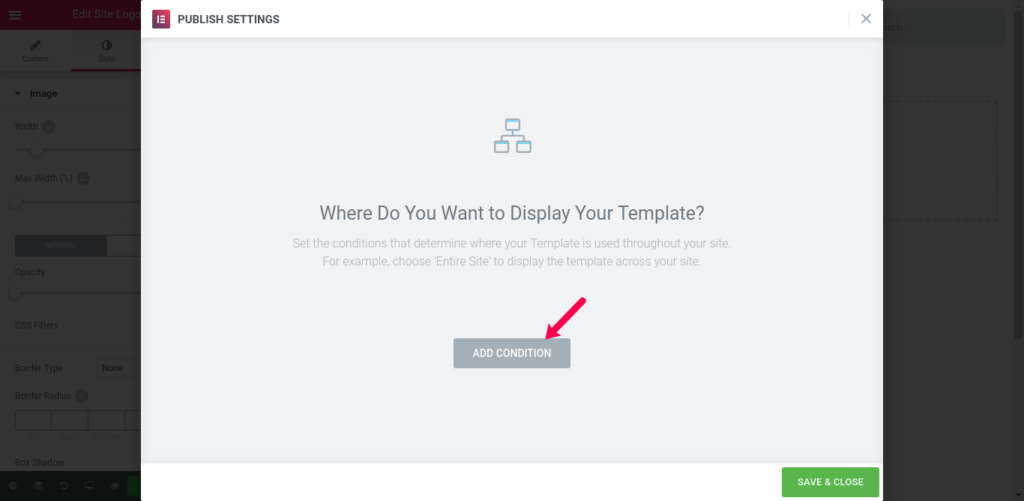
Next this is to add some conditions on how you would like your header to display.
Would you like your header to display on just some pages or on the entire website?
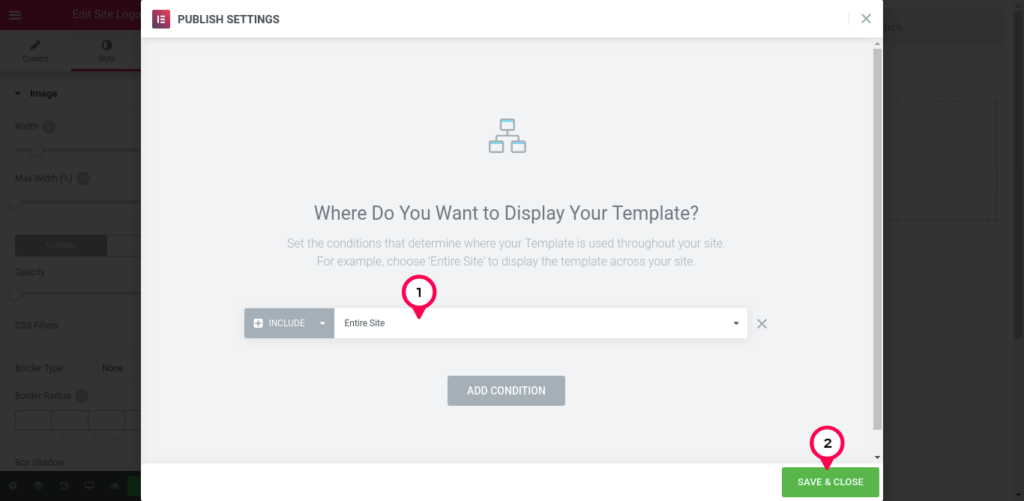
- Select “Entire Site” if you want the header to show on the entire website.
- Click “Save and Close” button to finish publishing your header

Visit your website and now you should have your new header display across the website.
Follow these steps when creating a footer but choose “Footer” as template type.
In Summary
There you have it, creating your custom header or footer in Elementor shouldn’t be difficult.
You can create custom header with free elementor by:
- Install Header, footer for elementor plugin.
- Install NavMenu addon for elementor plugin
- Create header or footer via Header Footer builder under customize
- Design your header or footer in Elementor
- Publish
- Create new template
- Choose header or footer as template type
- Design your template or choose from pre-made templates
- Set display condition
- Publish


