You probably know that, making regular backups of your website is really a good thing to do. But, how cumbersome is that, if you have to manually perform the backup yourself, regularly and repeatedly?
There is a better way to automate things, and have your website backups stored to your Google Drive or other popular cloud storages. In case things go wrong, you can simply restore it to it’s previous state.
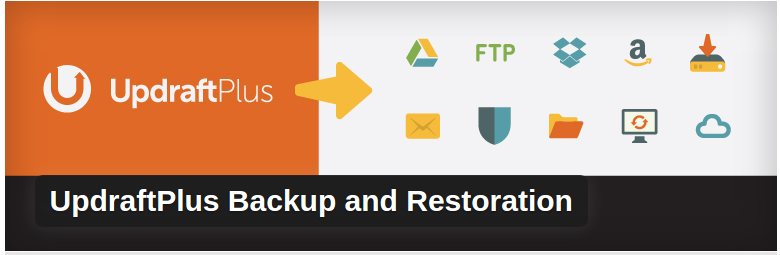
UpdraftPlus plugin allows you to schedule your website backups; daily, weekly, monthly, even every after 4 hours. You can then choose a remote storage where you want your backups kept; Google Drive, Dropbox, S3 Amazon and One Note, etcetera.
In this guide, I’m choosing Google drive because it’s the most complicated to connect. In case you choose to backup your website to other drives like Dropbox, it’s pretty easy and you won’t need to follow these procedures.
Using UpdraftPlus to backup and restore your wordpress sites is free. Migrating/Cloning a website requires you to purchase a Migrator add-on. However, a paid version is definitely worth it.
Install & Activate UpdraftPlus plugin.
From your WordPress dashboard, head over to Plugins. Search, Install and Activate UpdraftPlus plugin, and you are ready to start backup process.
 You can also download the plugin and manually upload it to your wordpress installation. Here is a link to download this plugin.
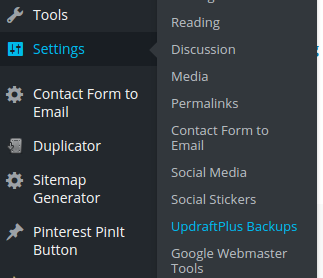
After you have activated the plugin, hover Settings from your WordPress dashboard and you will be able to see UpdraftPlus Backup right there. So, click to start the plugin.
You’ll see a window similar to one I provided in the screenshot below (You haven’t made any backup, so your ‘Existing Backup’ will be 0 of course).
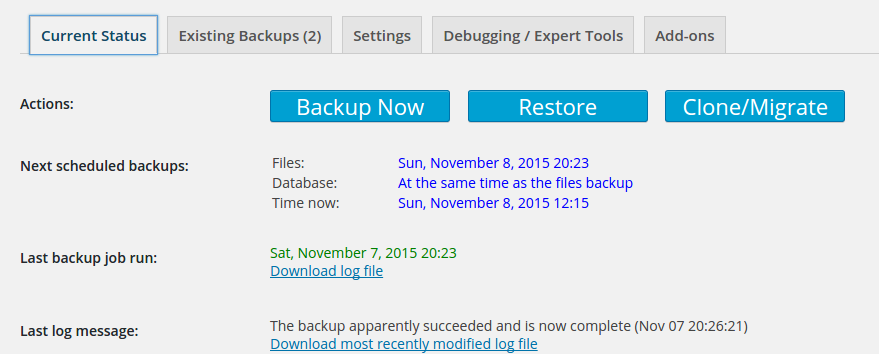
Though you can straight away backup your website by clicking on Buckup Now button, I suggest you consider setting up your backup settings.
So, click Setting tab above the buttons to start setting up your plugin (See screenshot below).
Settings
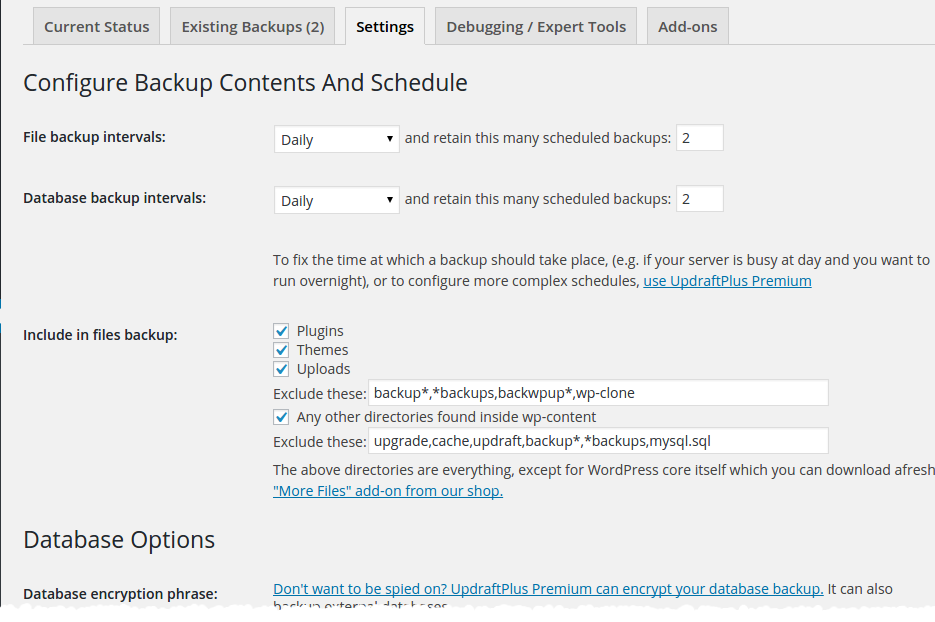
As you can see from the screenshot above, the first part of settings allows you to choose your preferred backup interval. You can also exclude or include plugins, themes and uploads by simply checking or unchecking the little boxes against them.
If you are backing up for the first time, you will want to leave the “Include in files backup” section as it is by default.
Connecting Your Google Drive to UpdraftPlus
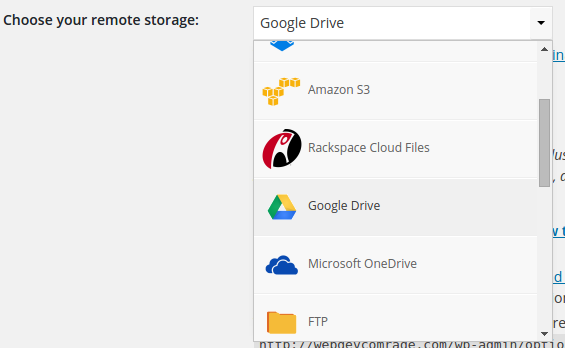
While still on Settings, you will want to scroll the page down until where you see “Copying Your Backup To Remote Storage“.
Just below this, you will see “Choose your remote storage“. Click drop down menu to choose Google Drive (See screenshot below).
After selecting Google Drive as your remote storage, your screen should change an appear like in a screenshot below.
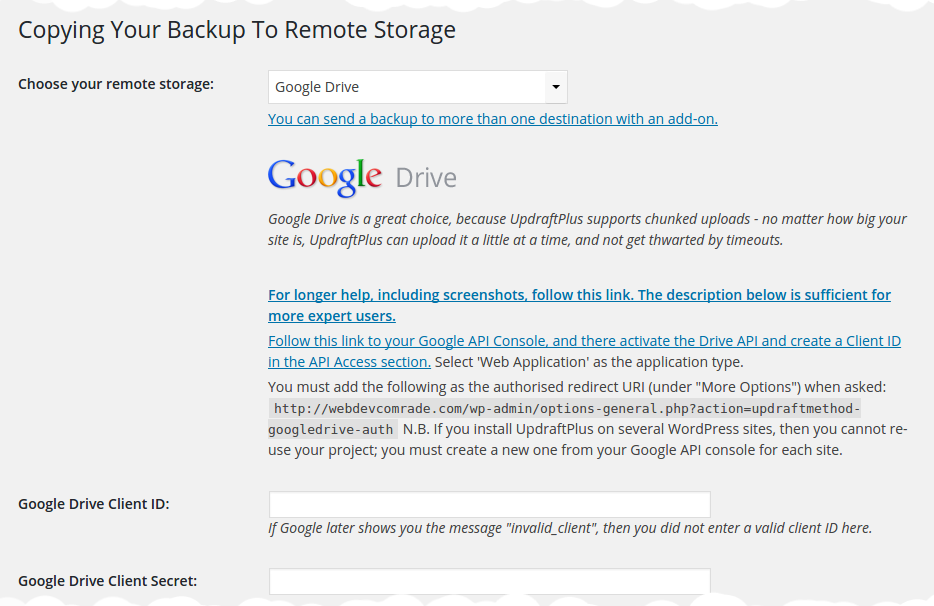
Now, the only confusing part is configuring your Google Drive API to work with Updraft plugin. However, the following steps should guide to do this quite easily.
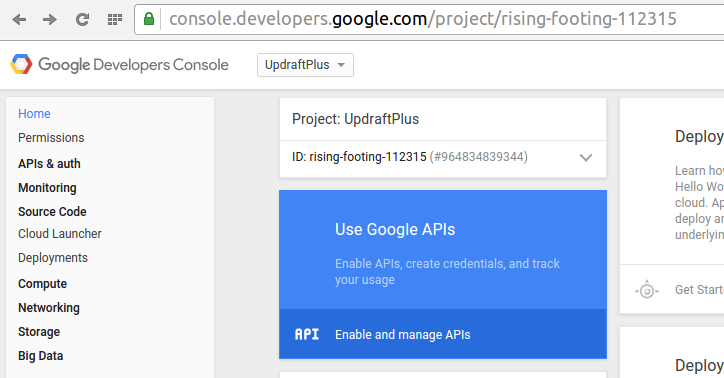
Step #1: Visit Google API Console & Create New Project.

The very first step is to visit Google Developers Console and create a new project. Click this link to visit your Google API Console, however, you should be logged into your Google account.
Press the blue “Create project” button and you should see the following form appear:-

Go ahead and type project name as “UpdraftPlus“. There is no need to worry about project ID, you can leave it to what is already generated. So, go ahead and click the “Create” button to Create the project.
This will lead you to a new window, which takes us to the next step.
Step #2: Activate the Drive API
On creating a new project, a new window like one below will show up…
On this window, look at the left menu and click on “APIs & auth” to expand this section.
Under API & auth, click on “APIs”. See screenshot below.
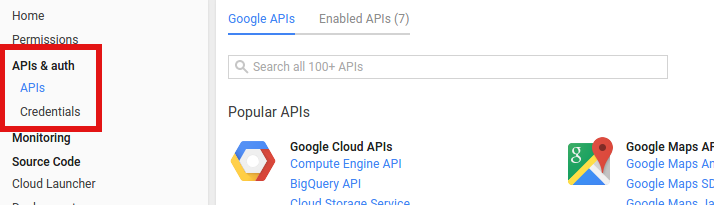
On clicking APIs, a new window showing popular APIs shows up, and above them you can search for an API using a search input.
In the search field, type in Drive to find the Drive API. See image below.

Typing drive in the search field, lets Drive API to show up in the search results.
Click on “Drive API” to open activation page below
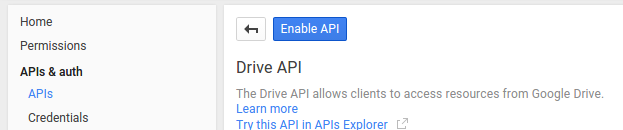
To activate the API, click Enable API blue button.
Step #3: Setting up Product Name and Email Address
From left hand menu, choose Credential below APIs & oauth.
On the new screen that shows up, you will want to look at the tabs up and switch to “AOuth screen conscent“.
You will then have to choose your Email and provide Product Name.
You can leave the rest of the fields empty. See image below.

Click Save button at the bottom of the form to proceed.
Step #4: Setting Up API Access Credentials
On clicking the Save button from the previous step, a screen (like one below) will show up.
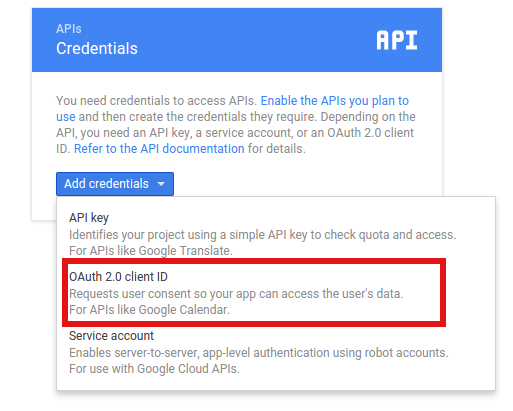
Click on the drop down menu “Add credentials” and select “OAuth 2.0 client ID” from the menu.
This will bring up a screen where you have to choose Application type.
From the option provided, choose “Web Application“.(See screenshot below).
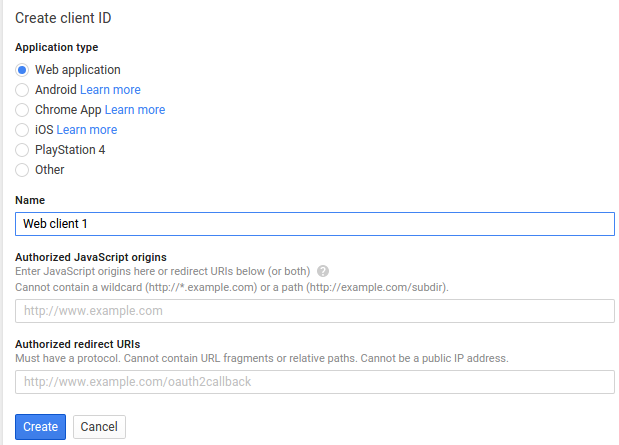
This form requires you to provide the following:-
- Name: You can give it any name, such as UpdraftPlus.
- Authorized JavaScript origins:
This should be your website address. http://wpchap.com for my. You should have your own.
Avoid adding a forward slash at th end of the address, for instance http://wpchap.com/.
- Authorized redirect URIs
To get this, you will have to return to UpdraftPlus plugin in your WordPress Dashboard.

Copy this code and paste it in this field. (See screenshot below).
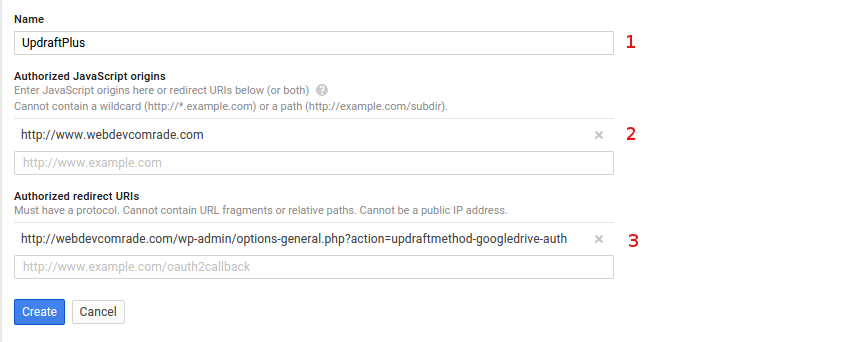
Click Create button to create your application.
If you have provided correct information, you should see a screen like one below:

This is the information required by UpdraftPlus plugin in order to start saving your backups to the Google Drive.
Completing UpdraftPlus Settings to Connect to Google Drive

Copy client ID from last step and paste it in Google Drive Client ID.
Similarly, copy the client secret code and past it in Google Drive Client Secret.
Save changes by clicking the Save Changes button at the bottom.
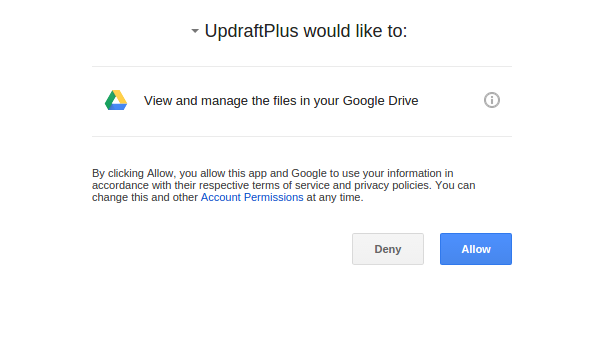
Completing authentication with Google.
After saving changes, you have to return to the plugin settings and complete authentication with Google.

To complete authentication, click on the link (see screenshot above) and the screen below will show up.
Final Remarks
Click Allow button and that is it!
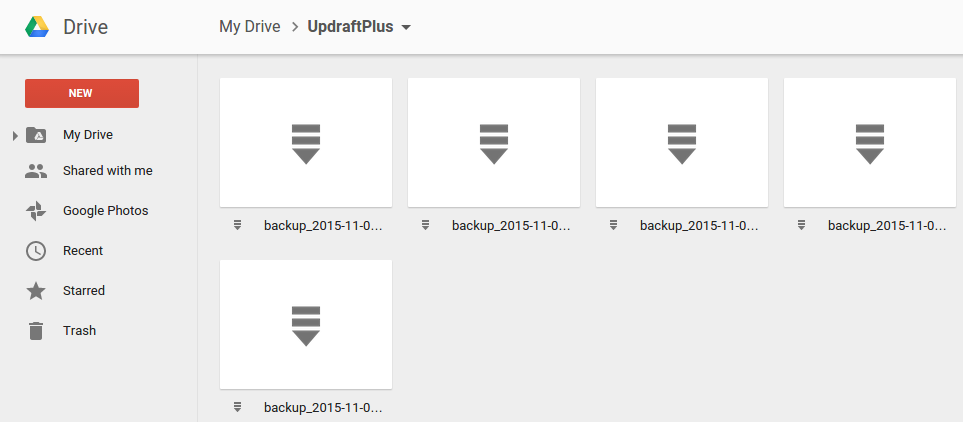
You just finished the hardest part and your the plugin is now ready to save your backups to your Google Drive.
Depending on how you scheduled your backups, Updraft plugin will then automatically store a copy of your backup to your Google drive.
A folder called UpdraftPlus is created on your Google drive by the plugin, and backups stored in it.
Just to remind you, this plugin allows other cloud drives too. Just in case you find setting up Google drive complicating, you can choose to use other drives like Dropbox.
However, with the steps above, you should be able to connect your to Google drive without much trouble.
Please leave your comment or questions below and I will be happy to read and reply to you.


6 thoughts on “How To Automatically Backup Your WordPress Site To Google Drive Using UpdraftPlus Plugin”
Hi,
Thank you for writing this great post about UpdraftPlus, it’s very informative (like the cover photo too). As you mention in the introduction, UpdraftPlus is compatible with a wide range of remote storage locations other than google drive all of which can be found here: http://updraftplus.com/shop/
Thanks,
Abbie
Marketing Manager @ UpdraftPlus
You are welcome, Abbie.
UpdraftPlus seems like a very useful plugin. I will definitely try it. It is good to have alternative backup than the one created by my web host – https://www.rosehosting.com
UpdraftPlus seems like a very useful plugin. I will definitely try it. It is good to have alternative backup than the one created by my web host – https://www.rosehosting.com